
Tie-dyeing is one of the most fun and creative ways to customize clothing, particularly shirts. From bold spirals to subtle pastels, the art of tie-dyeing allows you to express your personality, experiment with colors, and bring ordinary fabrics to life. But the magic of tie-dyeing doesn’t just come from the dyes — it starts with how you fold and manipulate the shirt.
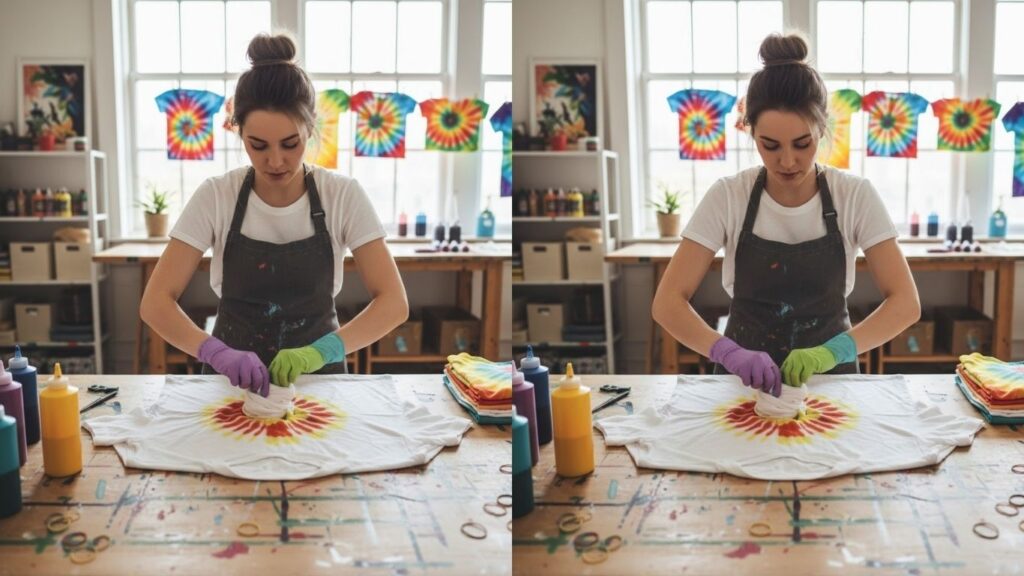
The way you fold, twist, or scrunch your shirt determines the pattern, the color placement, and ultimately, the visual impact of your tie-dye design. Mastering folding techniques is essential if you want vibrant, professional-looking results.
This guide will take you step by step through the art of folding shirts for tie-dye, exploring various folding techniques, color combinations, DIY tips, and creative inspiration to help you make your shirts pop with personality. Whether you’re a beginner or someone looking to perfect your tie-dye game, this post has everything you need.
Why Folding Matters in Tie-Dye
Folding is more than just a preparation step — it’s the foundation of your design. How you fold a shirt affects:
- Pattern Complexity: Some folds create clear, bold shapes, while others produce more abstract, blended effects.
- Color Distribution: The way fabric layers fold dictates how dyes reach different areas.
- Texture: Certain folds create crisp lines, others give a soft, diffused look.
- Uniqueness: Each fold produces a different result, ensuring that every shirt is one-of-a-kind.
Understanding folding techniques allows you to have greater control over your final tie-dye design, helping you achieve the exact aesthetic you want.
Materials You’ll Need
Before diving into folding techniques, make sure you have everything ready:
- White or light-colored cotton shirts (natural fibers work best)
- Fabric dyes (multiple colors for vibrant effects)
- Squeeze bottles for precise dye application
- Rubber bands for securing folds
- Gloves to protect your hands from stains
- Plastic table covering or tarp to protect surfaces
- Plastic bags or wrap for setting the dye
- Water and buckets for rinsing
Preparing Your Shirt for Folding
Preparation is key to successful tie-dyeing. Follow these steps before folding:
Wash and Dry
Wash your shirts to remove sizing or chemicals that may prevent dye absorption. Do not dry with fabric softener.
Keep Slightly Damp
For best results, keep your shirt slightly damp during folding. Wet fabrics absorb dye more evenly and allow colors to blend nicely.
Smooth Out Wrinkles
Smooth out wrinkles without stretching the fabric. This prevents unintended creases from affecting your pattern.
Choose Your Design Goal
Decide whether you want bold spirals, stripes, or abstract effects. Your folding technique should match your design intent.
Basic Folding Techniques
1. Spiral Fold
- Lay the shirt flat.
- Pinch the center where you want the spiral to start.
- Twist the fabric around that point until it forms a tight, flat spiral.
- Secure with rubber bands crisscrossing the spiral.
This classic design creates a radial burst of color, perfect for a bold, retro vibe.
2. Accordion or Fan Fold
- Lay the shirt flat and fold it back and forth like a paper fan, either horizontally or vertically.
- Secure with rubber bands at intervals along the fold.
This method is excellent for stripes or chevron effects, providing neat lines and structured color placement.
3. Crumple or Scrunch
- Lay the shirt flat, then randomly scrunch the fabric into a loose mound.
- Secure lightly with rubber bands to hold folds together.
Crumpled folds give an organic, watercolor-like effect with blended, soft patterns. Perfect for modern abstract designs.
4. Bullseye or Target Fold
- Pinch the center where you want the bullseye to appear.
- Pull the fabric upward into a cone shape.
- Secure at intervals with rubber bands.
This technique creates concentric circles, resembling a target or bullseye, with dye radiating outward.
5. Stripe Fold
- Fold the shirt into a long rectangle or strip.
- Accordion-fold along the width or length.
- Use rubber bands at intervals.
Stripe folds produce linear designs, giving clean, parallel bands of color.
Advanced Folding Techniques
1. Diagonal Fold
- Fold the shirt diagonally from corner to corner.
- Accordion-fold along the diagonal lines.
- Secure with rubber bands.
This creates angular patterns, offering a modern, geometric appearance.
2. Mandala-Inspired Fold
- Start with a spiral or bullseye fold.
- Create multiple mini folds along the spiral arms.
- Secure with rubber bands at different sections.
This produces intricate, multi-layered circular designs reminiscent of mandalas.
3. Layered Fold
- Stack multiple shirts or sections of the shirt.
- Apply different folding techniques to each layer.
- Secure individually for multi-pattern effects.
Layering allows experimentation with color overlap and complex patterns, producing visually stunning results.
Choosing the Right Colors
Color choice can make or break your tie-dye design. Consider the following:
Complementary Colors
Pair colors opposite each other on the color wheel (like blue and orange or purple and yellow) for vibrant contrast.
Analogous Colors
Choose colors next to each other on the color wheel for a harmonious blend.
Monochromatic Scheme
Select shades of a single color for a subtle, gradient effect.
Neutrals
White, black, gray, or beige can be used to break up colors and make bright hues pop.
Applying Dye to Your Folded Shirt
- Wear gloves to protect your hands.
- Squeeze dyes onto different sections of the folded shirt according to your pattern plan.
- Rotate the shirt to reach all sides evenly.
- Use lighter colors first, then darker colors to avoid muddying.
- Allow colors to bleed slightly for blended effects or apply carefully for crisp lines.
Setting the Dye
- Once applied, wrap the shirt in plastic or place in a sealed bag.
- Let it sit for 6–24 hours depending on the dye type.
- Heat may be applied for certain dyes (check manufacturer instructions).
Rinsing and Washing
- Remove rubber bands carefully.
- Rinse in cold water until water runs clear.
- Wash separately in warm water with mild detergent.
- Air-dry or tumble dry according to fabric instructions.
Tips for Vibrant Results
- Use high-quality fabric dyes for long-lasting color.
- Keep fabric damp for even absorption.
- Avoid over-saturating to prevent bleeding of colors.
- Experiment with fold tension — tighter folds create sharper patterns, looser folds produce softer designs.
- Always test on scrap fabric first if unsure about color combination.
Creative Tie-Dye Ideas
Spiral Rainbow Shirt
Use all primary colors in a spiral fold for a bold, retro look.
Ombre Scrunch Effect
Scrunch the shirt and apply colors from light to dark to create a gradient effect.
Bullseye Pastel
Soft pastel dyes on a bullseye fold produce a whimsical, dreamy look.
Stripe Rainbow
Use accordion folds with alternating rainbow colors for structured, vibrant stripes.
Mandala Burst
Combine a spiral fold with mini folds and multi-color layering for intricate mandala patterns.
Seasonal Tie-Dye Inspiration
Spring
Use light, pastel colors with soft scrunch folds for a gentle, airy vibe.
Summer
Bold, bright hues and spiral or bullseye folds evoke fun, festival-ready energy.
Autumn
Warm tones like burnt orange, burgundy, and mustard with scrunch folds reflect fall foliage.
Winter
Deep jewel tones with layered folds can create sophisticated and cozy patterns for colder months.
Common Mistakes to Avoid
- Applying too much dye at once — leads to muddy colors.
- Over-tightening rubber bands — can make folds hard to rinse.
- Skipping pre-wash — sizing can prevent dye absorption.
- Using synthetic fabrics — cotton or natural fibers work best.
- Not letting the dye set long enough — results in faded patterns.
FAQs
Can I use multiple folding techniques on one shirt?
Yes! Combining methods creates unique, layered effects.
How long should the dye set?
Typically 6–24 hours; darker colors and deeper saturation benefit from longer setting times.
Can I tie-dye on colored shirts?
Yes, but colors may blend with the shirt’s original hue. White or light fabrics give the most vibrant results.
How do I preserve the colors?
Wash in cold water separately and use mild detergents. Avoid bleach.
Can children do tie-dye safely?
Yes, with supervision and non-toxic dyes. Rubber gloves and protective covering for surfaces are recommended.
Final Words
Folding a shirt for tie-dye is both an art and a science. The way you twist, scrunch, or fold fabric dictates the outcome of your design. By mastering folding techniques, experimenting with colors, and following proper dyeing and washing methods, you can create vibrant, one-of-a-kind shirts that reflect your personality.
Tie-dyeing is an enjoyable, creative experience — whether for personal use, gifts, or even small business projects. With the tips, techniques, and inspiration shared in this guide, you’ll be able to make shirts that truly pop with color and creativity every time.