
A hand-knitted baby jumper is one of the most treasured gifts you can create for a newborn or toddler. Soft, personal, and made with care, it carries warmth that no shop-bought garment can match. Whether you’re picking up needles for the first time or returning to a beloved craft, knitting a baby jumper is a deeply rewarding project that requires only basic skills and a little patience.
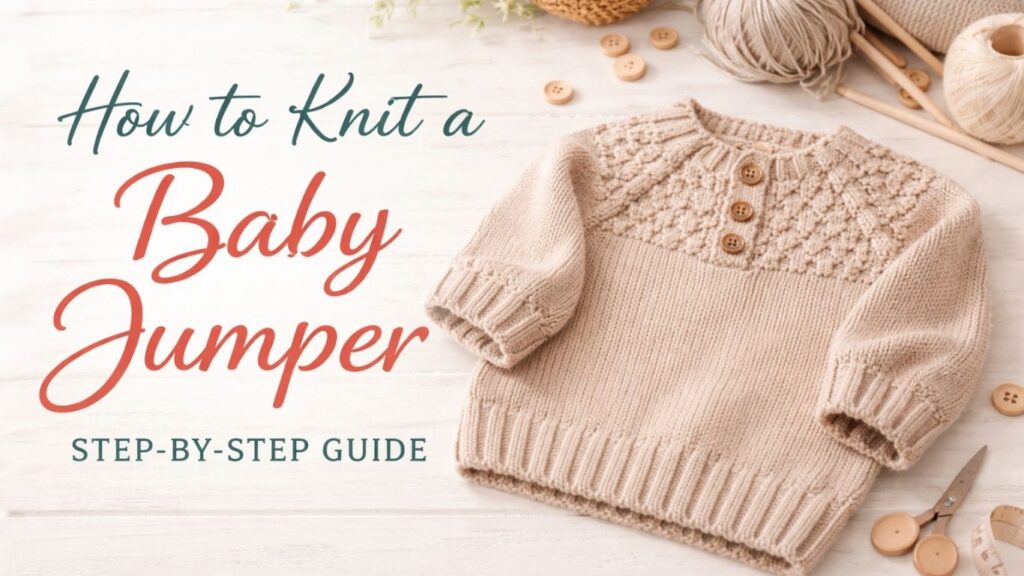
This guide walks you through every stage of the process — choosing the right yarn, understanding sizing, and working each piece from cast-on to cast-off. You’ll also find a curated selection of free patterns, complete with full details, to help you begin your project with confidence.
What You’ll Need
Yarn
- Weight: DK (double knitting) or Aran weight yarn works best for baby garments — soft, washable, and warm.
- Fibre: Choose baby-safe fibres such as merino wool, cotton, or acrylic blends labelled “superwash” or “machine washable.”
- Amount: Typically 200–400g depending on size and pattern.
Needles
- Straight or circular needles in the size recommended by your pattern (commonly 3.5mm–4.5mm for baby knits).
- A set of double-pointed needles (DPNs) or a short circular needle for sleeves if knitting in the round.
Other Tools
- Stitch markers
- Tapestry/yarn needle (for seaming and weaving in ends)
- Scissors
- Stitch holders or spare yarn
- A tape measure
- Row counter (optional but helpful)
Understanding Sizing
Baby jumpers are generally sized by age:
| Size | Chest (cm) | Length (cm) |
|---|---|---|
| Newborn | 36–38 | 24–26 |
| 0–3 months | 38–40 | 26–28 |
| 3–6 months | 40–44 | 28–32 |
| 6–12 months | 44–48 | 32–36 |
| 12–18 months | 48–52 | 36–40 |
| 18–24 months | 52–56 | 40–44 |
Always knit a tension (gauge) swatch before starting to ensure your finished garment matches the intended size.
How to Knit a Tension Swatch
- Cast on 20–30 stitches using your chosen yarn and needles.
- Work in stocking stitch (knit one row, purl one row) for 20–30 rows.
- Cast off loosely and lay the swatch flat.
- Measure how many stitches and rows equal 10cm × 10cm.
- Compare to the pattern’s stated tension. If you have too many stitches, go up a needle size. Too few, go down a size.
Getting tension right is the single most important step before knitting any garment.
Basic Construction: How a Baby Jumper is Structured
Most baby jumpers are knitted in one of three ways:
- Flat in pieces — front, back, and two sleeves knitted separately then seamed together.
- In the round — body worked as a seamless tube, then sleeves added.
- Top-down raglan — knitted in one piece from the neck downward, increasing at four raglan points. Ideal for beginners.
The step-by-step guide below follows the flat-pieces method, which is the most common in traditional patterns.
Step-by-Step: Knitting a Baby Jumper
Step 1: Cast On the Back Panel
Using your chosen needles and yarn, cast on the number of stitches specified in your pattern for the back. For a 3–6 month size in DK yarn at standard tension, this is typically around 50–60 stitches.
Tip: Use a long-tail cast on for a neat, elastic edge.
Step 2: Work the Rib Border
Work 2×2 rib (knit 2, purl 2) or 1×1 rib (knit 1, purl 1) for 2–3cm. This forms the hem and prevents curling.
Step 3: Work the Body
Switch to stocking stitch (knit on right side, purl on wrong side) or your pattern stitch. Continue straight until the piece measures the required length to the armhole — typically 14–18cm depending on size.
Step 4: Shape the Armholes
Cast off a small number of stitches at each end (usually 3–5 stitches each side) to create the armhole shaping. Then work straight until the armhole reaches the required depth (typically 10–14cm).
Step 5: Shape the Shoulders and Back Neck
Cast off stitches in groups across each shoulder. Place the remaining centre neck stitches on a holder — these will be used when picking up for the neckband later.
Step 6: Knit the Front Panel
Work the front panel exactly as the back until you reach the neck shaping point (usually 2–3cm before the shoulder bind-off).
Front neck shaping:
- Knit across to the centre stitches, place the centre group on a holder.
- Work each shoulder separately.
- Decrease 1 stitch at the neck edge every row (or every other row) until you have the same number of shoulder stitches as the back.
- Cast off the shoulder stitches.
Step 7: Knit the Sleeves (Make 2)
Cast on sleeve cuff stitches and work rib for 2–3cm. Then switch to stocking stitch and increase 1 stitch each end every 4–6 rows (as directed by your pattern) until you have the required sleeve width. Continue straight to the required sleeve length. Shape the sleeve cap by casting off a few stitches each side, then decreasing until a small number of stitches remain. Cast off.
Step 8: Block All Pieces
Before seaming, wet-block or steam-block each piece:
- Dampen the piece or hold steam iron just above it (don’t press).
- Pin to the correct measurements on a blocking mat.
- Leave to dry completely.
Blocking makes seaming easier and gives the garment a professional finish.
Step 9: Seam the Jumper Together
Using a tapestry needle and matching yarn:
- Shoulder seams first — join front and back at the shoulders using mattress stitch or three-needle bind-off.
- Neckband — pick up stitches around the neck opening (including those on holders) and work 1–2cm of rib. Cast off loosely. For babies, a button opening at one shoulder makes dressing easier.
- Set in sleeves — pin the sleeve cap into the armhole, easing to fit, and seam with mattress stitch.
- Side and sleeve seams — join in one continuous seam from hem to cuff on each side.
Step 10: Finishing
- Weave in all loose ends securely using a tapestry needle.
- Sew on any buttons, making sure they are firmly attached and cannot be pulled off by small fingers.
- Give the finished jumper a final light press or steam if needed.
- Check the inside for any yarn tails or rough spots that could irritate baby’s skin.
Helpful Techniques to Know
Mattress Stitch
The neatest way to join vertical edges. Work between the edge stitches on both pieces, picking up the horizontal bar between stitches alternately on each side. Pull yarn gently to close the seam.
Picking Up Stitches for the Neckband
With right side facing, use your needle to pick up one stitch for every row along vertical edges and one stitch for every stitch along horizontal edges. Space evenly to avoid a puckered or flared neckline.
Short-Row Shoulder Shaping
For a more tailored shoulder fit, some patterns use short rows instead of stepped cast-offs. Work to a turning point, wrap the next stitch, and turn back. This creates a smooth diagonal slope.
Buttonholes
For a simple yarn-over buttonhole: on the right side row, work to the buttonhole position, yarn over (yo), knit 2 together (k2tog). On the following row, work the yarn-over as a normal stitch.
Free Patterns
Below are six thoroughly detailed free baby jumper patterns, each with full specifications to help you choose the right one for your skill level, yarn stash, and preferred construction method.
1. Sirdar Simple DK Baby Jumper
| Detail | Info |
|---|---|
| Pattern Name | Simple DK Baby Jumper |
| Designer | Sirdar Design Team |
| Source / Website | sirdar.com |
| Price | Free |
| Skill Level | Beginner |
| Construction Method | Flat pieces, seamed |
| Yarn Weight | DK (double knitting) |
| Recommended Yarn | Sirdar Snuggly DK |
| Yarn Amount | Approx. 100–200g depending on size |
| Needle Size | 3.25mm and 4mm |
| Tension / Gauge | 22 sts × 28 rows = 10cm in stocking stitch on 4mm needles |
| Sizes Available | Newborn, 0–3m, 3–6m, 6–12m, 12–18m, 18–24m |
| Neckline Style | Round neck with ribbed band |
| Sleeve Type | Set-in sleeves, long |
| Stitch Pattern | Stocking stitch body, 1×1 or 2×2 rib borders |
| Finishing Details | Button opening at one shoulder for easy dressing |
| Best For | First-time garment knitters; quick gift projects |
| Notes | One of the most widely used beginner baby patterns in the UK. Clear, well-formatted instructions with schematic diagrams included. |
2. DROPS Design Baby Sweater “Karisma”
| Detail | Info |
|---|---|
| Pattern Name | Baby Sweater in Karisma |
| Designer | DROPS Design |
| Source / Website | garnstudio.com |
| Price | Free |
| Skill Level | Easy–Intermediate |
| Construction Method | Top-down raglan, worked in the round (seamless) |
| Yarn Weight | Aran / Worsted |
| Recommended Yarn | DROPS Karisma |
| Yarn Amount | Approx. 150–300g depending on size |
| Needle Size | 4.5mm circular needles (40cm and 80cm) |
| Tension / Gauge | 18 sts × 24 rows = 10cm in stocking stitch on 4.5mm needles |
| Sizes Available | 1m, 3–6m, 9m, 12m, 18m, 2 years, 4 years |
| Neckline Style | Round neck, ribbed collar |
| Sleeve Type | Raglan, worked in the round, long |
| Stitch Pattern | Stocking stitch throughout; optional colourwork yoke versions available |
| Finishing Details | Minimal finishing required; seamless construction |
| Best For | Knitters comfortable with circular needles and magic loop or DPNs for sleeves |
| Notes | DROPS offers several versions of this design — plain, striped, and Fair Isle. All are free. Pattern available in 20+ languages. |
3. Paintbox Simply DK Baby Jumper
| Detail | Info |
|---|---|
| Pattern Name | Simply DK Baby Jumper |
| Designer | Paintbox Yarns Design Team |
| Source / Website | lovecrafts.com |
| Price | Free |
| Skill Level | Beginner–Easy |
| Construction Method | Flat pieces, seamed |
| Yarn Weight | DK (double knitting) |
| Recommended Yarn | Paintbox Yarns Simply DK |
| Yarn Amount | Approx. 100–250g depending on size |
| Needle Size | 3.25mm and 3.75mm |
| Tension / Gauge | 22 sts × 28 rows = 10cm in stocking stitch on 3.75mm needles |
| Sizes Available | 0–6m, 6–12m, 1–2 years, 2–3 years, 3–4 years |
| Neckline Style | Round neck |
| Sleeve Type | Set-in sleeves, long |
| Stitch Pattern | Stocking stitch body with contrast stripe yoke; 2×2 rib cuffs, hem and collar |
| Finishing Details | Simple mattress stitch seams; no buttons required |
| Best For | Knitters who want a modern, colourful design without complex techniques |
| Notes | The Paintbox DK is an affordable, widely available yarn in 50+ shades. Pattern is clearly written with a full schematic. Great stash-buster pattern. |
4. “February Baby Sweater” by Elizabeth Zimmermann
| Detail | Info |
|---|---|
| Pattern Name | February Baby Sweater |
| Designer | Elizabeth Zimmermann |
| Source / Website | ravelry.com |
| Price | Free (requires free Ravelry account) |
| Skill Level | Intermediate |
| Construction Method | Top-down, worked flat with a button band opening at front |
| Yarn Weight | DK or Light Worsted |
| Recommended Yarn | Any smooth DK; Cascade 220 Superwash popular choice |
| Yarn Amount | Approx. 200–350g depending on size |
| Needle Size | 4mm straight or circular |
| Tension / Gauge | 20 sts = 10cm in stocking stitch (tension is flexible with this construction) |
| Sizes Available | Newborn to 2 years (adjustable using EZ percentage system) |
| Neckline Style | Open cardigan-style front with button band |
| Sleeve Type | Set-in, worked flat and seamed |
| Stitch Pattern | Feather-and-fan lace yoke on stocking stitch body |
| Finishing Details | 5–6 small buttons up the front; optional lace edging on cuffs |
| Best For | Intermediate knitters who want a heirloom-quality, timeless design |
| Notes | Originally published in Knitter’s Almanac (1974). One of the most beloved baby knitting patterns ever written. The lace yoke looks intricate but is worked on a simple 4-row repeat. Hundreds of project photos on Ravelry for reference. |
5. Tin Can Knits “Simple Baby Sweater” (Simple Collection)
| Detail | Info |
|---|---|
| Pattern Name | Simple Baby Sweater |
| Designer | Tin Can Knits (Emily Wessel & Alexa Ludeman) |
| Source / Website | tincanknits.com |
| Price | Free (PDF download, no account required) |
| Skill Level | Beginner |
| Construction Method | Top-down raglan, worked in the round (seamless) |
| Yarn Weight | DK |
| Recommended Yarn | Any DK weight; Cascade 220 Superwash or Paintbox Simply DK suggested |
| Yarn Amount | Approx. 100–250g depending on size |
| Needle Size | 3.5mm and 3.75mm circular (80cm) + DPNs or magic loop for sleeves |
| Tension / Gauge | 22 sts × 30 rows = 10cm in stocking stitch on 3.75mm needles |
| Sizes Available | 0–3m, 3–6m, 6–12m, 12–18m, 18–24m |
| Neckline Style | Round neck, stretchy ribbed collar |
| Sleeve Type | Raglan, worked in the round, long or short sleeve options |
| Stitch Pattern | Stocking stitch body; 1×1 rib at cuffs, hem and collar |
| Finishing Details | Virtually seamless; only a few ends to weave in |
| Best For | Absolute beginners wanting a fast, satisfying first sweater |
| Notes | Part of a comprehensive free collection covering multiple sizes from baby to adult. Tin Can Knits patterns are exceptionally well-written with clear diagrams, a full glossary, and photo tutorials. Highly recommended for new garment knitters. |
6. Purl Soho “Newborn Raglan”
| Detail | Info |
|---|---|
| Pattern Name | Newborn Raglan |
| Designer | Purl Soho Design Team |
| Source / Website | purlsoho.com |
| Price | Free |
| Skill Level | Easy–Intermediate |
| Construction Method | Top-down raglan, worked in the round (seamless) |
| Yarn Weight | Worsted or heavy DK |
| Recommended Yarn | Purl Soho Linen Quill or any soft worsted |
| Yarn Amount | Approx. 150–200g for newborn–3m size |
| Needle Size | 4mm and 4.5mm circular (40cm and 60cm) |
| Tension / Gauge | 18 sts × 26 rows = 10cm in stocking stitch on 4.5mm needles |
| Sizes Available | Newborn, 0–3m, 3–6m (focused on smaller sizes) |
| Neckline Style | Round neck, wide ribbed collar |
| Sleeve Type | Raglan, long, worked in the round |
| Stitch Pattern | Stocking stitch throughout; garter stitch or rib at edges |
| Finishing Details | Near-seamless; snap or button optional at shoulder |
| Best For | Knitters who want a quick newborn gift with a modern, clean aesthetic |
| Notes | Purl Soho patterns are accompanied by extensive step-by-step photo tutorials for every technique used — ideal for visual learners. The website’s free patterns section contains dozens of well-photographed baby projects. |
Tips for Success
- Always swatch. Even experienced knitters are surprised by how much tension can vary between projects.
- Use smooth, light-coloured yarn for your first attempt so you can easily see your stitches.
- Knit a size up. Babies grow fast. A 6–12 month garment will be worn longer than a newborn size.
- Check buttons carefully. Any button smaller than a 50p coin (or quarter) is a choking hazard. Sew them on very securely.
- Wash your swatch the same way you’ll wash the finished jumper to check for shrinkage or colour bleeding before committing to the full project.
- Join yarn at the side seams, not the centre, so any joins are hidden in the seam.
Caring for Hand-Knitted Baby Garments
- Hand wash in cool water with a gentle wool wash, or machine wash on a delicate/wool cycle if the yarn label permits.
- Lay flat to dry — never hang knitted garments, as this can stretch them out of shape.
- Store folded, not on hangers.
- Keep away from moths using natural cedar or lavender.
Knitting a baby jumper is a wonderfully satisfying project. Once you’ve completed your first one, you’ll find the construction becomes second nature — and you’ll have a beautiful, lasting gift that no shop-bought item can match.
where is the pattern?
i’ve added
Yes! Where? After all that long pre-amble – no pattern?
check it now
Once again a post without patterns. Please provide the patterns and photos so that we can enjoy knitting them.