
A well-oiled sewing machine is a happy sewing machine. Whether you sew daily or only occasionally, proper oiling is one of the most important maintenance habits you can develop. It keeps your machine running smoothly, prevents costly repairs, improves stitch quality, and extends the life of your equipment.
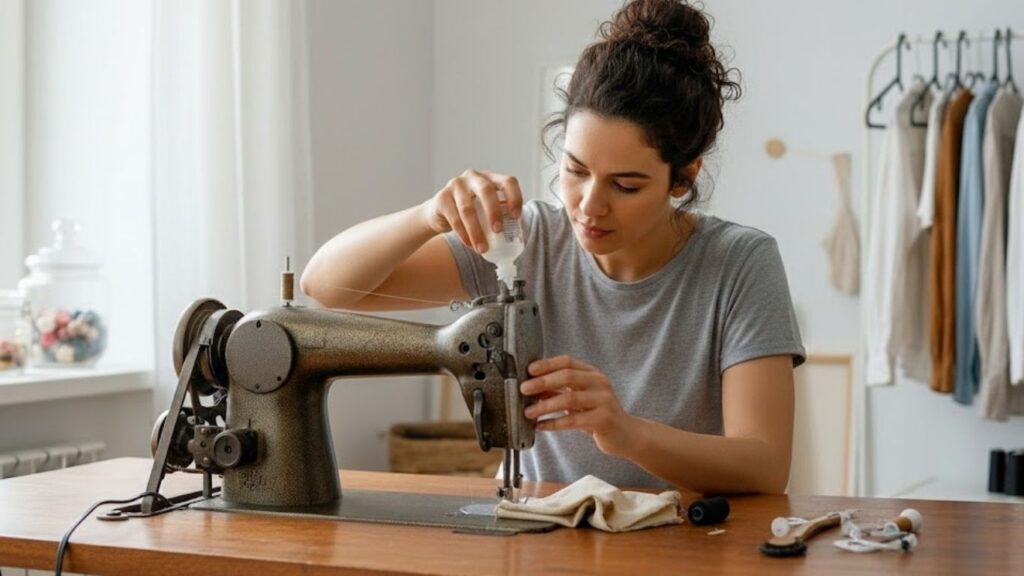
Many people avoid oiling their sewing machine because they think it’s complicated or risky. In reality, learning how to oil a sewing machine is straightforward, safe, and empowering when done correctly. This guide walks you through everything step by step, using clear language and practical tips suitable for beginners and experienced sewists alike.
By the end of this post, you’ll know when to oil, where to oil, what oil to use, and how to avoid common mistakes.
Why Oiling a Sewing Machine Is Important
A sewing machine is made up of many moving metal parts. As these parts rub against each other during use, friction builds up. Without proper lubrication, this friction can cause wear, overheating, noise, skipped stitches, and even mechanical failure.
Oiling your sewing machine helps to:
- Reduce friction between moving parts
- Prevent rust and corrosion
- Ensure smooth, even stitching
- Reduce noise and vibration
- Extend the lifespan of the machine
- Improve overall sewing performance
Think of oiling as preventive care. A few minutes of maintenance can save hours of frustration and expensive repairs later.
Understanding Your Sewing Machine Before Oiling
Before you apply a single drop of oil, it’s essential to understand what type of sewing machine you own and how it is designed to be maintained.
Mechanical vs Computerized Sewing Machines
Mechanical sewing machines usually require regular oiling. These machines rely heavily on metal parts and gears that benefit from manual lubrication.
Computerized sewing machines often have sealed or self-lubricating components. Many of them do not require oiling at all, or only in very specific areas.
Always check your machine’s manual. If the manual says “do not oil,” follow that instruction strictly.
New Machines vs Older Machines
- Older machines generally need oiling more frequently because they lack modern self-lubricating systems.
- Newer machines may require less frequent oiling, but still benefit from proper care if the manual allows it.
Vintage machines especially rely on regular oiling to stay functional.
When Should You Oil a Sewing Machine?
Knowing when to oil your sewing machine is just as important as knowing how.
Signs Your Machine Needs Oiling
Look out for these common signs:
- Unusual squeaking or grinding noises
- Machine feels stiff when turning the handwheel
- Uneven or inconsistent stitches
- Increased vibration
- Machine runs slower than usual
If you notice any of these issues and your manual permits oiling, it’s likely time for maintenance.
How Often Should You Oil?
The frequency depends on how often you sew:
- Heavy use (daily or weekly): every 1–2 months
- Moderate use (a few times a month): every 3–6 months
- Occasional use: before starting a new project after long storage
Machines used in dusty environments may need more frequent oiling.
What Oil Should You Use?
Using the correct oil is critical. The wrong oil can damage your sewing machine permanently.
The Only Oil You Should Use
Use clear sewing machine oil only. This oil is specially formulated to be lightweight, non-sticky, and residue-free.
Characteristics of proper sewing machine oil:
- Clear and odorless
- Thin and fast-flowing
- Does not gum up over time
Oils You Should Never Use
Avoid these at all costs:
- Cooking oils
- Motor oil
- Household lubricants
- Grease or heavy oils
- Multi-purpose sprays
These oils can thicken, attract dust, and damage internal parts.
Tools and Supplies You’ll Need
Before you start, gather everything you need to avoid interruptions.
Basic Supplies
- Sewing machine oil
- Soft lint-free cloth
- Small cleaning brush
- Cotton swabs
- Screwdriver (if required)
- Scrap fabric
Having everything ready makes the process smooth and stress-free.
Safety Precautions Before Oiling
Proper preparation ensures safety for both you and your machine.
Steps to Take Before You Begin
- Turn off the machine
- Unplug it from the power source
- Remove the needle
- Remove the presser foot
- Remove thread from the machine
These steps prevent accidents and allow better access to oiling points.
Step-by-Step Guide: How to Oil a Sewing Machine
Now let’s get into the actual oiling process.
Step 1: Clean the Machine Thoroughly
Never oil a dirty machine. Oil mixed with lint creates sticky buildup that causes more harm than good.
Focus on:
- Bobbin area
- Feed dogs
- Under needle plate
- Hook race
Use a brush or cotton swab to remove lint and dust. Avoid blowing air into the machine, as this pushes debris deeper inside.
Step 2: Identify Oiling Points
Oiling points vary by machine model, but common areas include:
- Hook race
- Bobbin case area
- Moving joints and pivots
- Metal parts that rub together
Your manual may include a diagram showing exact oiling spots.
Step 3: Apply Oil Sparingly
Less is more when it comes to oiling.
How to apply oil correctly:
- Use only one drop per oiling point
- Apply directly to metal parts
- Avoid plastic, rubber, and belts
Excess oil can leak onto fabric and attract dust.
Step 4: Manually Distribute the Oil
After applying oil, gently turn the handwheel toward you several times. This helps distribute the oil evenly across moving parts.
Do not run the machine at full speed immediately.
Step 5: Wipe Away Excess Oil
Use a clean cloth to wipe off any visible oil. Pay close attention to areas near the needle and presser foot.
Step 6: Test the Machine
Thread the machine and run it on scrap fabric.
- Start at a slow speed
- Sew a few lines
- Check for oil stains or unusual sounds
If oil transfers to fabric, continue wiping and testing until clean.
Oiling Specific Parts of the Sewing Machine
Different areas require different attention.
Oiling the Bobbin Area
This is one of the most important areas to oil.
Steps:
- Remove the bobbin and case
- Clean thoroughly
- Apply one drop of oil to the hook race
- Rotate the handwheel to distribute
This reduces friction where the thread loop forms.
Oiling the Upper Mechanism
Some machines allow access to the upper internal parts by removing a cover.
Apply oil to:
- Metal joints
- Moving arms
- Pivot points
Never oil gears unless specifically instructed.
Oiling the Handwheel Area
If accessible, apply a tiny amount of oil to the handwheel shaft to keep it turning smoothly.
Machines That Should Not Be Oiled
Not all machines need oiling.
Computerized and Self-Lubricating Models
Many modern machines use sealed bearings and self-lubricating components.
If your manual says:
- “Do not oil”
- “No oiling required”
Follow those instructions strictly and rely on professional servicing instead.
Common Mistakes to Avoid
Even experienced sewists can make mistakes. Avoid these common errors:
- Using too much oil
- Oiling plastic parts
- Skipping cleaning before oiling
- Using the wrong oil
- Oiling machines that should not be oiled
Each of these mistakes can cause long-term damage.
How to Oil a Sewing Machine After Long Storage
Machines that have been sitting unused for months or years need extra care.
Steps for Stored Machines
- Clean thoroughly
- Apply oil to key metal parts
- Turn the handwheel slowly
- Let the machine sit overnight
- Test on scrap fabric
This allows the oil to penetrate and loosen stiff components.
Oiling Vintage Sewing Machines
Vintage machines are particularly dependent on regular oiling.
Special Tips for Older Machines
- Oil more frequently
- Check for dried or hardened oil
- Clean thoroughly before re-oiling
- Use only sewing machine oil
With proper care, vintage machines can sew beautifully for decades.
How Oiling Affects Stitch Quality
Proper oiling directly impacts stitch performance.
Benefits include:
- Smoother fabric feeding
- More consistent stitch length
- Reduced thread breakage
- Improved tension balance
If your stitches look uneven or inconsistent, oiling may solve the issue.
Maintenance Tips Beyond Oiling
Oiling works best as part of a broader maintenance routine.
Additional Care Habits
- Clean lint regularly
- Change needles often
- Use quality thread
- Cover your machine when not in use
- Schedule professional servicing as needed
Together, these habits keep your machine in top condition.
Troubleshooting After Oiling
If something feels off after oiling, don’t panic.
Common Issues and Solutions
Oil stains on fabric:
Keep sewing on scrap fabric until excess oil is absorbed.
Machine feels sluggish:
Wipe excess oil and allow time for distribution.
Unusual noise continues:
The issue may require professional servicing.
Teaching Beginners to Oil a Sewing Machine
If you’re helping someone new to sewing, start slow.
Tips for beginners:
- Demonstrate each step
- Emphasize small oil amounts
- Explain why oiling matters
- Encourage reading the manual
Building confidence early prevents fear and mistakes later.
Final Thoughts
Learning how to oil a sewing machine is one of the most valuable skills a sewist can have. It’s simple, cost-effective, and essential for keeping your machine running smoothly.
When done correctly, oiling improves performance, protects delicate parts, and makes sewing more enjoyable. The key is patience, cleanliness, and using the right oil in the right places.
By making oiling part of your regular sewing routine, you ensure that your machine stays reliable, quiet, and ready for every creative project ahead.
A well-maintained sewing machine isn’t just a tool — it’s a long-term partner in your creative journey.