
Wax stains on clothes are frustrating but far from permanent. Whether it’s candle wax dripped on your favourite shirt, crayon wax on a child’s school uniform, or car wax on workwear, the same core principles apply — and with the right method, most wax stains come out completely without damaging the fabric.
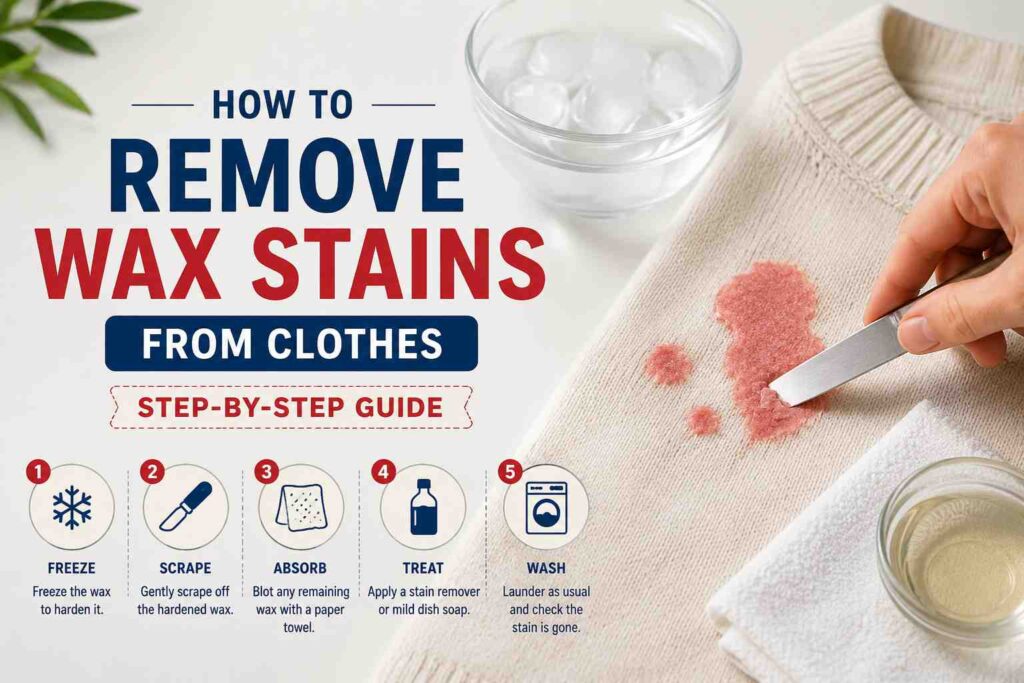
This complete guide covers every effective method for removing wax stains from clothes — from freezing and ironing to solvents and natural remedies — so you can choose the best approach for your fabric and get your garment looking good as new.
Items to Buy for Removing Wax Stains from Clothes
- Butter knife or blunt scraper
- Brown paper bags or paper towels
- Rubbing alcohol or isopropyl alcohol
- Pre-wash stain remover spray
- White vinegar
- Dish soap or washing up liquid
- Dry cleaning solvent
- WD-40
- Ice pack or freezer bags
- Clean white cloths
What Happens When Wax Gets on Clothes
Understanding how wax behaves on fabric helps you remove it more effectively. When hot wax lands on clothing, it immediately begins to cool and harden, penetrating the fabric fibers as it solidifies. Once set, it creates two distinct problems: the physical wax deposit sitting on and within the fibers, and in the case of colored candles or crayons, a dye stain left behind even after the wax itself is removed.
Effective wax stain removal always happens in two stages. First, you remove the physical wax — either by hardening it and scraping it off, or by reheating it and absorbing it away. Second, you treat any remaining oily residue or color stain with an appropriate cleaning agent. Skipping the first stage and going straight to washing almost always sets the stain permanently into the fibers.
Golden rule: Never rub a fresh wax stain. Rubbing pushes the wax deeper into the fabric fibers and spreads the stain wider. Always work from the outside of the stain inward, and always remove the physical wax before applying any liquid treatment.
Method 1: The Freezing Method — Best for Most Fabrics
The freezing method is the safest and most universally applicable approach for removing wax from clothes. It works by hardening the wax completely so it becomes brittle and can be cleanly snapped or scraped away from the fabric without spreading. This method is ideal for delicate fabrics, colored fabrics, and any garment where heat could cause damage or color bleeding.
What You Need
- A plastic bag filled with ice, or access to a freezer
- A blunt knife, spoon, or credit card
- Stain remover or dish soap
- Cold water
Step-by-Step Instructions
- Allow the wax to harden completely if it is still soft. Never attempt to remove liquid or soft wax — you will spread it further into the fabric. If the wax is fresh, leave it untouched until it solidifies naturally, or place an ice pack on top to speed up the process.
- Place the garment in a sealed plastic bag and put it in the freezer for one to two hours. The wax needs to be completely frozen and brittle — not just cool. Alternatively, hold an ice pack directly over the wax stain for 15 to 20 minutes if freezer access is inconvenient.
- Remove the garment from the freezer and work quickly. The wax will warm up and become flexible again as it reaches room temperature, so you have a limited window to work with it while it is still brittle.
- Using a blunt knife, the edge of a spoon, or a credit card, gently flex the fabric and snap the wax away. It should break off in pieces. Work around the edges of the stain first, then the center. Pick off any remaining fragments with your fingernails.
- Shake the garment firmly over a bin to remove any loose wax fragments from the fabric fibers.
- Treat any remaining oily residue with a pre-wash stain remover or a small amount of dish soap. Apply directly to the stain, work gently into the fabric with your fingers, and leave for five minutes.
- Wash according to the garment’s care label — ideally at the warmest temperature the fabric safely tolerates. Check the stain before drying. If any residue remains, repeat the treatment before putting it in the dryer. Heat from a dryer will permanently set any remaining stain.
Best for: Delicate fabrics, silk, wool, synthetic blends, dark-colored clothing, and any garment where you are concerned about heat damage or color transfer.
Method 2: The Ironing Method — Best for Large Wax Deposits
The ironing method works by remelting the hardened wax so it is absorbed into an absorbent material rather than the fabric. It is particularly effective for large wax deposits and for wax that has penetrated deeply into thick or textured fabrics. This method requires careful temperature control — too much heat can damage synthetic fabrics or set any dye from colored candles deeper into the fibers.
What You Need
- Iron
- Brown paper bags, plain paper, or paper towels (not printed newspaper — the ink transfers)
- Blunt knife or spoon
- Stain remover or rubbing alcohol
Step-by-Step Instructions
- Allow the wax to harden completely before starting. Remove as much surface wax as possible by scraping gently with a blunt knife or the edge of a spoon. The less wax remaining on the fabric, the less the paper needs to absorb.
- Place the garment on an ironing board with the wax stain facing upward. Lay a piece of brown paper bag or several layers of plain paper over the stain. Place another piece of paper underneath the stained area if the fabric is thin, to prevent wax from transferring to the ironing board cover.
- Set your iron to a low to medium heat. Avoid steam. For synthetic fabrics, use the lowest setting. For natural fibers like cotton and linen, a medium setting is appropriate. When in doubt, start lower — you can always increase heat if the wax is not melting, but you cannot undo fabric damage from excessive heat.
- Press the iron gently over the paper covering the stain for 10 to 15 seconds at a time. Lift and check the paper — you should see wax being absorbed into it as a dark, waxy mark.
- Move the paper to a clean section each time before pressing again. Reusing the same area of paper risks re-depositing absorbed wax back onto the fabric.
- Repeat until no more wax transfers onto the paper. This may take several rounds with fresh paper. Be patient — rushing this stage by increasing the heat risks damaging the fabric or spreading any dye from colored wax.
- Treat any remaining oily residue or color stain with rubbing alcohol, a pre-wash stain remover, or dish soap. Apply, leave for five minutes, then wash as normal according to the care label.
Best for: Cotton, linen, denim, and other natural fabrics with large wax deposits. Use caution or avoid entirely for synthetic fabrics, silk, and heavily dyed garments where heat could cause color transfer.
Method 3: Rubbing Alcohol — Best for Removing Colored Wax Dye
Rubbing alcohol, also known as isopropyl alcohol, is particularly effective for the second stage of wax stain removal — treating the oily residue and color stain left behind after the physical wax has been removed. It works by dissolving the waxy residue and breaking down the dye pigments from colored candles and crayons, making them easier to lift from the fabric fibers.
Step-by-Step Instructions
- Remove the physical wax first using either the freezing or ironing method before applying rubbing alcohol.
- Test the alcohol on an inconspicuous area of the fabric — inside a seam or hem — and wait five minutes to check for any adverse reaction such as color fading or fabric damage. Rubbing alcohol is safe for most fabrics but can strip color from some dyed natural fibers.
- Apply rubbing alcohol to a clean white cloth — never directly onto the fabric, as this can flood the fibers and spread the stain.
- Blot the stain gently from the outside edges inward. Do not rub — blotting lifts the stain out of the fabric rather than pushing it deeper.
- Continue blotting with fresh sections of cloth until no more color transfers onto the cloth.
- Rinse the treated area with cold water to remove the alcohol and any loosened residue.
- Apply a small amount of dish soap to the area, work gently into the fabric, and wash as normal.
Best for: Colored wax stains from crayons and dyed candles, particularly on white or light-colored fabrics where the dye component of the stain is the primary problem.
Method 4: Dish Soap and Hot Water — Best for Fresh Wax Residue
Dish soap is a surprisingly effective wax stain treatment, particularly for the oily residue left after the physical wax has been removed. Its degreasing properties cut through waxy deposits in much the same way it cuts through cooking grease, making it a readily available and gentle option for most fabrics.
Step-by-Step Instructions
- Remove the physical wax first using the freezing or scraping method.
- Apply a generous amount of dish soap directly to the remaining stain and work it gently into the fabric with your fingers or a soft toothbrush. Use circular motions working from the outside of the stain inward.
- Leave the dish soap to sit for 10 to 15 minutes. This dwell time allows the soap’s degreasing agents to penetrate and break down the waxy residue.
- Rinse with the hottest water safe for the fabric — check the care label. Hot water helps lift the loosened residue more effectively than cold.
- Check the stain before washing. If residue remains, repeat the dish soap application before putting the garment in the machine. Washing without fully treating the stain first risks setting it with the machine’s heat.
- Wash according to the care label at the recommended temperature. Air dry and check the stain before applying any heat from a tumble dryer.
Best for: General wax residue on everyday fabrics like cotton, polyester, and denim. Particularly useful when rubbing alcohol or commercial stain removers are not immediately available.
Method 5: White Vinegar — Best for Natural and Delicate Fabrics
White vinegar is a gentle, natural alternative to chemical solvents that works well on delicate and natural fabrics that cannot tolerate alcohol or commercial stain removers. Its mild acidity helps break down waxy residue without the risk of color stripping or fabric damage that stronger solvents can cause.
Step-by-Step Instructions
- Remove as much physical wax as possible using the freezing method before applying vinegar.
- Heat white vinegar until warm — not boiling. Warm vinegar is more effective than cold at dissolving waxy residue.
- Apply warm vinegar to a clean white cloth and blot the stained area gently. Work from the outside edges of the stain inward.
- For stubborn residue, soak a cloth in warm vinegar and lay it over the stain for 15 to 20 minutes to allow it to penetrate.
- Rinse with cold water and check the stain. Repeat if necessary.
- Wash as normal according to the care label. The vinegar smell disappears completely once the garment is washed and dried.
Best for: Silk, wool, linen, and other delicate natural fabrics where stronger chemical treatments carry too great a risk of damage. Also ideal for baby clothing and garments worn against sensitive skin.
Method 6: Dry Cleaning Solvent — Best for Dry-Clean-Only Fabrics
For garments labeled dry clean only — including wool suits, silk blouses, velvet, and structured formal wear — home wet treatments carry a genuine risk of water damage, shrinkage, or distortion. A dry cleaning solvent applied at home offers an intermediate option between professional dry cleaning and risky wet treatment.
Step-by-Step Instructions
- Remove the physical wax by freezing and carefully scraping — this is safe even for dry-clean-only garments as no liquid is involved.
- Read the dry cleaning solvent instructions carefully before applying. Products vary in application method and dwell time.
- Test on a hidden area of the fabric and wait the recommended time before proceeding.
- Apply the solvent to a clean cloth — never directly to the fabric — and blot the stained area gently from outside to center.
- Allow to dry naturally in a well-ventilated area. Most solvents evaporate completely without rinsing.
- If the stain persists or the garment is valuable, take it to a professional dry cleaner and point out the stain specifically. Professional treatment produces the best results for delicate and high-value garments.
Best for: Suits, blazers, silk, velvet, structured coats, and any garment with a dry-clean-only care label.
Method 7: WD-40 — Best for Stubborn Crayon Wax
WD-40 is a surprisingly effective tool for removing crayon wax from clothing, particularly from children’s school uniforms and everyday wear. Its lubricating properties penetrate and loosen waxy crayon deposits that have been ground into fabric fibers — the kind of stain that freezing and scraping alone doesn’t fully resolve.
Step-by-Step Instructions
- Remove any surface crayon wax by scraping gently with a blunt knife or the edge of a spoon.
- Spray a small amount of WD-40 directly onto the stain and leave for two to three minutes. The WD-40 penetrates the fibers and loosens the waxy crayon deposit.
- Apply dish soap directly over the WD-40 — this is important, as dish soap removes the oily WD-40 residue along with the wax. Work the soap into the fabric gently.
- Rinse with warm water and check the stain. The crayon color should have lifted significantly.
- Apply a pre-wash stain remover and wash at the warmest temperature safe for the fabric.
- Air dry and check before tumble drying — heat from a dryer will permanently set any remaining stain or WD-40 residue.
Best for: Crayon wax on cotton, polyester, and school uniform fabrics. Not recommended for silk, wool, or delicate fabrics.
Wax Stain Removal by Fabric Type
Different fabrics require different approaches. Use this quick reference to choose the safest and most effective method for your specific garment.
| Fabric Type | Best Method | Methods to Avoid |
|---|---|---|
| Cotton and linen | Ironing method or freezing method, followed by dish soap or stain remover | Nothing to avoid — cotton tolerates most treatments well |
| Polyester and synthetics | Freezing method followed by rubbing alcohol or dish soap | High heat ironing — synthetics melt and distort under excessive heat |
| Silk | Freezing method followed by white vinegar or dry cleaning solvent | Hot water, rubbing alcohol, and high heat ironing |
| Wool | Freezing method followed by white vinegar; low heat ironing with caution | Hot water (causes shrinkage), aggressive scrubbing, WD-40 |
| Denim | Ironing or freezing method, followed by dish soap or stain remover | Nothing to avoid — denim is robust and tolerates most methods |
| Velvet | Freezing method only — very careful scraping; professional dry cleaning recommended | Ironing (crushes pile permanently), rubbing, WD-40 |
| Dry-clean-only | Freezing method for physical removal; dry cleaning solvent for residue | All wet treatments — take to professional dry cleaner if in doubt |
Wax Stain Removal Checklist
Work through this checklist every time you encounter a wax stain to make sure you approach it in the right order and don’t accidentally set the stain permanently.
Stage 1: Physical Wax Removal
- Allow wax to harden completely before touching
- Choose freezing or ironing method based on fabric type
- Scrape or break off as much physical wax as possible
- Remove all wax fragments by shaking over a bin
Stage 2: Residue and Stain Treatment
- Identify fabric type and choose appropriate treatment method
- Test treatment on a hidden area first
- Apply treatment and allow appropriate dwell time
- Blot (never rub) from outside of stain inward
- Rinse with appropriate water temperature
- Repeat treatment if stain persists before washing
Stage 3: Washing and Drying
- Wash at highest temperature safe for fabric
- Check stain completely before tumble drying
- Air dry if any stain remains — repeat treatment if needed
- Only tumble dry once stain is completely gone
Frequently Asked Questions About Removing Wax Stains from Clothes
Can you remove dried wax from clothes?
Yes — dried and fully hardened wax is actually easier to remove than soft or partially set wax. Hardened wax responds well to the freezing method, becoming brittle enough to snap cleanly away from the fabric fibers. Fresh soft wax is more likely to spread when handled. If you discover a wax stain that has been there for some time, the freezing method followed by an appropriate residue treatment is your best starting point.
Does wax come out in the washing machine?
Not on its own — and attempting to machine wash a wax stain without prior treatment is likely to make things worse. The washing machine’s heat can partially melt the wax, spreading it further into the fabric fibers and potentially transferring it to other items in the load. Always remove the physical wax and treat the residue before putting any wax-stained garment in the washing machine.
How do you get colored candle wax out of clothes?
Colored candle wax presents a two-part problem: the wax itself and the dye it contains. Remove the physical wax first using the freezing or ironing method. Then treat the color stain left behind with rubbing alcohol, which is particularly effective at dissolving candle dye pigments. For light-colored fabrics with a significant color stain, a commercial pre-wash stain remover containing enzymes or oxygen bleach used according to the label instructions is the most effective follow-up treatment.
Can you get wax out of clothes after washing?
It depends on whether the garment has been tumble dried after washing. If it was air dried, the stain can still usually be treated — apply the appropriate method, retreat the residue, and wash again. If the garment was tumble dried with the wax stain still present, the heat may have set the stain permanently into the fibers. In this case, a commercial stain remover specifically formulated for grease and oil stains is worth trying, but results vary and the stain may not come out completely.
What removes candle wax from delicate fabrics?
The safest approach for delicate fabrics — silk, wool, cashmere, and velvet — is the freezing method for physical wax removal followed by white vinegar or a dry cleaning solvent for any remaining residue. Avoid hot water, high heat ironing, rubbing alcohol, and WD-40 on delicate fabrics. For valuable or irreplaceable garments, taking the item to a professional dry cleaner after removing the surface wax is strongly recommended.
Does hairspray remove wax from clothes?
Hairspray containing alcohol can help loosen wax residue from fabric in a similar way to rubbing alcohol, as the alcohol content dissolves the waxy deposit. However, modern hairsprays often contain conditioning agents and polymers that can leave their own residue on fabric. Rubbing alcohol is a cleaner, more reliable alternative that produces better results without the risk of adding additional residue. Use hairspray only as a last resort when no other options are available.
How do you remove wax from a school uniform?
School uniform fabrics are typically polyester or polyester-cotton blends, making the freezing method the safest first step — the ironing method risks melting synthetic fibers. After freezing and removing the physical wax, treat any remaining crayon color or waxy residue with dish soap or rubbing alcohol. For stubborn crayon stains specifically, the WD-40 method followed by dish soap is particularly effective on polyester uniform fabrics. Always check the care label before applying any treatment and test on a hidden seam first.
Wax stains look alarming in the moment — a pool of colored wax setting into your best tablecloth fabric or your child’s uniform can feel like a disaster. But with the right method applied in the right order, the vast majority of wax stains come out completely, leaving no trace behind.
Work through the stages methodically, choose the method that suits your fabric, and always check the stain before applying any heat. Your clothes will thank you for the patience.