
Crochet lovers are always looking for creative ways to express themselves through fun and unique designs, and one of the most charming trends lately is the mushroom granny square. If you adore woodland or cottagecore aesthetics, this project is going to become your new favorite! The mushroom granny square combines the nostalgic feel of classic granny squares with the whimsical beauty of mushrooms — making it a perfect motif for blankets, bags, sweaters, or home décor.
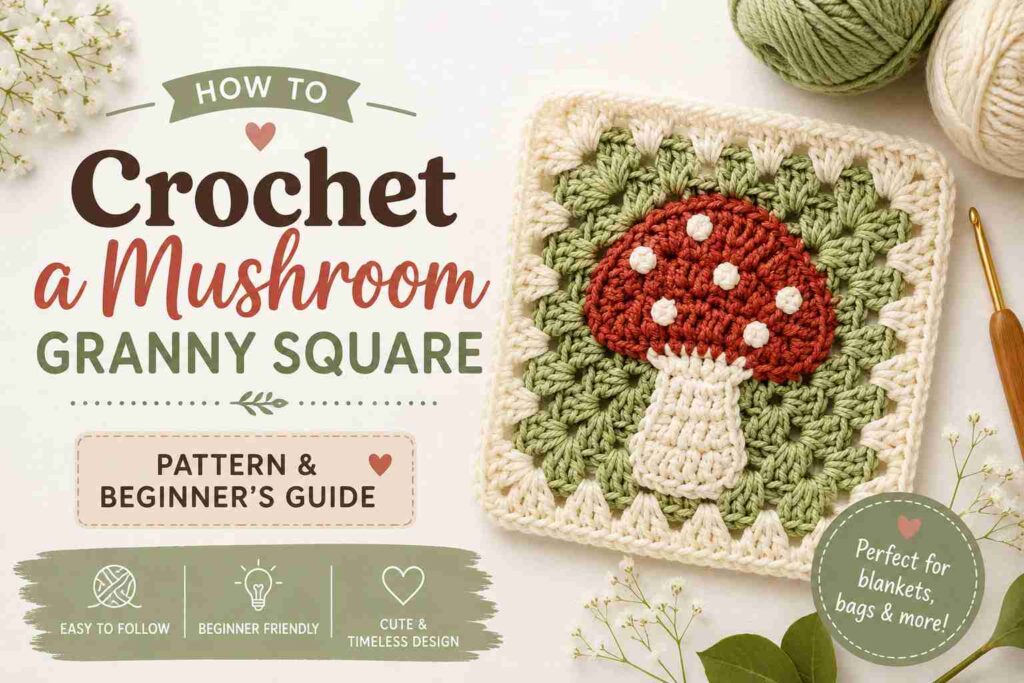
The beauty of this design lies in its versatility. You can make your mushroom granny squares in any color palette — realistic tones like red, cream, and brown, or magical shades like lavender, teal, and gold. Each square becomes a little piece of art, and when joined together, they form a cozy, playful masterpiece.
In this guide, you’ll learn everything you need to know about how to crochet a mushroom granny square — from choosing yarn to creating each stitch step by step. Whether you’re a beginner or an experienced crocheter, you’ll enjoy this relaxing and rewarding project.
Before we dive into the detailed tutorial, let’s go through a few must-have tools and materials that will make your crocheting experience much easier.
5 Essential Items to Buy Before You Start Crocheting a Mushroom Granny Square
To get the best results and enjoy the process, you’ll want to have the right supplies. Here are five important items to gather before you start learning how to crochet a mushroom granny square.
1. Crochet Hooks
For mushroom granny squares, a 4mm (G-6) or 5mm (H-8) hook is ideal, depending on your yarn weight. Choose an ergonomic handle to reduce hand strain, especially if you plan to make multiple squares for a larger project.
2. Yarn
This project shines with medium-weight (worsted) or cotton yarn. You’ll need at least three to four colors:
- Base color: usually green or brown for the background.
- Mushroom cap: red, orange, or any bright color.
- Mushroom stem: beige, cream, or white.
- Accent color: for details or borders (optional).
Cotton yarn gives a crisp stitch definition, while acrylic adds softness and warmth.
3. Yarn Needle
A must-have for weaving in ends and sewing small pieces like the mushroom cap and stem if you make them separately. A blunt-tipped metal or plastic needle works best.
4. Stitch Markers
These help mark your corners and keep track of where rounds start and end. Especially useful when working with multiple colors or joining new yarns.
5. Scissors
A pair of small, sharp scissors will make trimming yarn ends neat and easy. Having good scissors is surprisingly important for a tidy finish.
Why the Mushroom Granny Square Is So Popular
The mushroom granny square isn’t just adorable — it’s a wonderful way to blend traditional crochet motifs with modern, nature-inspired creativity. Here’s why it’s loved by crocheters everywhere:
- It’s versatile: Perfect for bags, blankets, cardigans, or wall hangings.
- It’s colorful: A great project for experimenting with vibrant yarns.
- It’s whimsical: Adds a fun, fairytale touch to your work.
- It’s beginner-friendly: You can make it even if you’ve just learned basic stitches.
- It’s customizable: Play with shapes, sizes, and styles to make it your own.
Now that you have everything you need, let’s dive into the step-by-step process of how to crochet a mushroom granny square from start to finish.
Step-by-Step Guide: How to Crochet a Mushroom Granny Square
This pattern is divided into three main sections:
- Making the background square
- Crocheting the mushroom cap and stem
- Joining the mushroom to the granny square
Take your time with each part, and don’t rush — the best results come from patience and consistency.
Step 1: Crochet the Base Granny Square
Start with your background color (for example, green or brown).
- Make a magic ring or chain 4 and join into a loop with a slip stitch.
- Chain 3 (counts as your first double crochet).
- Into the ring, make 2 more double crochets, then chain 1.
- Repeat (3 double crochets, chain 1) three more times. You’ll now have four groups of 3 double crochets.
- Join with a slip stitch to the top of the chain 3.
This is your first round.
- Round 2: Chain 3 (counts as dc), 2 dc in the same space, chain 1, (3 dc, chain 1, 3 dc, chain 1) in each corner space. Join with a slip stitch.
- Round 3: Continue in the same pattern, adding groups of 3 dc between corners.
Your square should now be about 3–4 inches across. This forms the background where the mushroom will sit.
Step 2: Crochet the Mushroom Stem
Switch to your stem color (beige or white).
- Chain 7.
- Turn, skip the first chain, and single crochet (sc) in each of the next 6 stitches.
- Chain 1 and turn, then sc across again. Repeat for 4 rows to form a small rectangle.
- Fasten off and leave a long tail for sewing later.
This forms the mushroom stem — simple, neat, and slightly thick.
Step 3: Crochet the Mushroom Cap
Switch to your mushroom cap color (red, orange, or any vibrant shade).
- Chain 4 and join with a slip stitch to form a loop.
- Chain 3 (counts as dc), then work 11 double crochets into the ring. Join to the top of the chain 3.
- Chain 2, and in each stitch around, make 2 half double crochets (hdc) to form a semi-circle shape.
- To make the cap look more curved, stop halfway around and turn. Work single crochets across the flat edge.
You’ll now have a half-circle shape resembling a mushroom top.
Step 4: Add White Dots to the Cap
To make your mushroom cap even cuter, add small white dots.
- With white yarn, chain 2 and slip stitch to form a tiny ring.
- Chain 1, work 6 single crochets in the ring, and close with a slip stitch.
- Make 3–5 dots of different sizes.
- Sew them randomly onto the red mushroom cap using a yarn needle.
Step 5: Assemble the Mushroom
Now that both the cap and stem are ready, sew them together before attaching to the granny square.
- Align the cap’s bottom edge slightly over the stem’s top.
- Stitch the two pieces together securely using your yarn needle.
- Weave in loose ends to the back.
Step 6: Attach the Mushroom to the Granny Square
Place the mushroom motif on the center of your background square.
- Use a yarn needle and matching thread color to sew it onto the square carefully.
- Stitch around the edges of the mushroom cap and stem so that it lies flat.
- Ensure that no yarn tails are visible from the back.
Once attached, your mushroom granny square will instantly come to life!
Step 7: Optional Border
If you’d like a framed look, add a border to your square.
- Join a contrasting color in any corner.
- Chain 1 and single crochet evenly around all sides.
- In each corner, work 3 single crochets to keep the shape square.
- Join with a slip stitch and fasten off.
This gives your mushroom square a polished, finished appearance.
Tips for Perfecting Your Mushroom Granny Square
Even though how to crochet a mushroom granny square is a fairly beginner-friendly project, a few tips can help you make it even better:
- Keep stitches consistent: Uneven tension can distort the mushroom shape.
- Use bright contrast: Choose colors that make the mushroom pop against the background.
- Block your squares: Pin your finished squares to shape them perfectly before joining.
- Use soft yarn: Especially if you’re making clothing or blankets.
- Experiment: Try different cap shapes — some round, some tall, even polka-dotted styles!
Creative Project Ideas Using Mushroom Granny Squares
Once you learn how to crochet a mushroom granny square, the possibilities are endless! Here are some creative ideas to make the most of your finished squares:
1. Cozy Mushroom Blanket
Join multiple mushroom squares together to create a cozy, woodland-inspired throw blanket — perfect for adding charm to any space.
2. Tote Bag
Sew several squares together to create a fun crochet tote bag with a retro forest vibe. Add lining and straps for durability.
3. Cardigan or Sweater
Use mushroom squares as panels in a granny square cardigan. It’s a playful and stylish way to show off your crochet skills.
4. Cushion Covers
Add a nature-inspired touch to your living room by using mushroom squares to cover pillows.
5. Wall Hanging
Mount a few colorful mushroom granny squares on a dowel and turn them into a cute wall hanging for your craft room or bedroom.
Troubleshooting Common Mistakes
The Square Isn’t Lying Flat
If your square curls or puckers, check that you’re not adding extra stitches in the corners or pulling the yarn too tightly.
The Mushroom Looks Uneven
Count stitches carefully when crocheting the cap and stem. Blocking can also help reshape uneven pieces.
The Dots Won’t Stay Flat
Sew the dots tightly around the edges to ensure they don’t curl up.
The Cap Looks Too Small
Add an extra round of half double crochets for a larger mushroom top.
How to Join Mushroom Granny Squares
After making several squares, you can join them to form larger projects. Here are some joining techniques:
Whip Stitch Join
Place two squares right sides together and whip stitch through back loops only for a seamless join.
Slip Stitch Join
Use a hook to slip stitch through both squares along the edges for a neat, visible seam.
Join-As-You-Go
Crochet your last round directly onto a neighboring square to save time and create smooth edges.
Caring for Your Crochet Projects
To make sure your mushroom granny square creations last a long time:
- Hand wash gently in cold water with mild detergent.
- Avoid wringing or twisting; gently press out excess water.
- Lay flat on a towel to dry.
- Store folded items in a cool, dry place to avoid stretching.
Frequently Asked Questions (FAQ)
How long does it take to make a mushroom granny square?
It usually takes about 45 minutes to 1 hour per square, depending on your crochet speed.
Can beginners make this pattern?
Absolutely! As long as you know basic stitches like chain, single crochet, and double crochet, you can easily make this pattern.
What yarn should I use?
Worsted-weight cotton or acrylic yarn works best for durability and color definition.
How many colors do I need?
You’ll need at least three: one for the background, one for the mushroom stem, and one for the cap. Adding a border color is optional.
Can I make the mushroom part larger?
Yes! Just add extra rows to the mushroom cap or stem before sewing it to the square.
Can I crochet the mushroom directly onto the square?
Yes, you can crochet the mushroom directly onto the background instead of making it separately — just follow the same shape and stitch count.
What projects can I make with mushroom granny squares?
Blankets, tops, hats, bags, scarves, and even coasters — the possibilities are endless.
How do I keep my edges straight when joining?
Make sure each square is blocked and evenly sized before joining them together.
Final Words
Learning how to crochet a mushroom granny square is not just about creating a pretty piece of fabric — it’s about exploring creativity, relaxation, and self-expression through yarn. The mushroom motif brings a touch of nature and whimsy to your crochet projects, allowing you to make something both nostalgic and trendy.
With a few yarn colors and a crochet hook, you can turn simple stitches into something magical. Whether you’re making a cozy blanket, a fun tote bag, or a dreamy cardigan, the mushroom granny square adds a delightful handmade touch to everything.
So grab your yarn, get comfortable, and start crocheting your own field of little mushrooms today. Before long, you’ll have a collection of squares ready to stitch into your next favorite project — all made by your own hands.