
Crocheting isn’t just about blankets and scarves anymore—it’s a full-blown fashion statement! One of the most exciting crochet trends making a comeback is granny square pants. These colorful, vintage-inspired pants blend the nostalgic charm of handmade crafts with bold, modern style. If you’ve ever wanted to create something fun, cozy, and completely unique, learning how to crochet granny square pants is the perfect project.
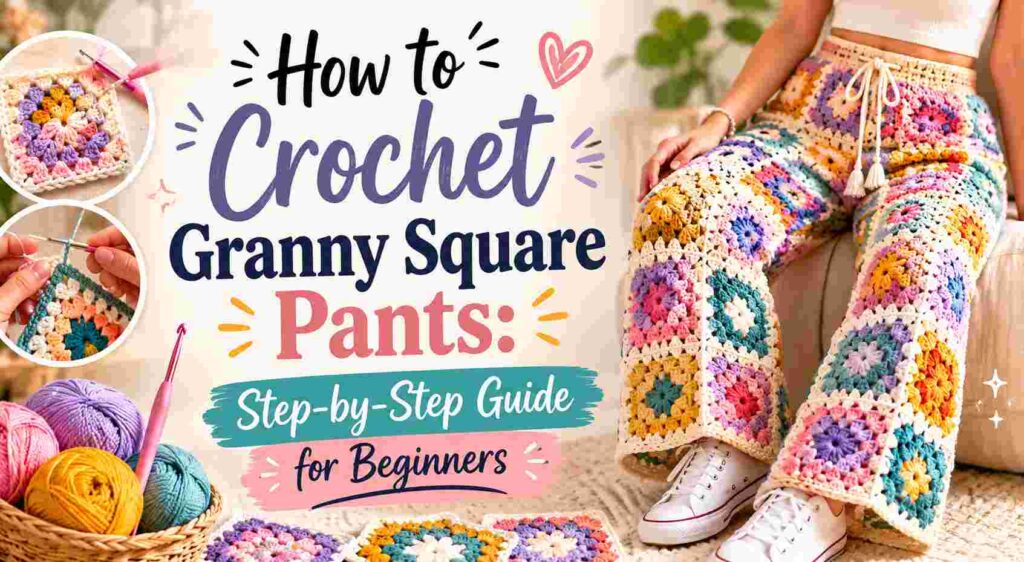
The beauty of granny square pants lies in their versatility. You can go bright and bold with rainbow colors or soft and neutral for a more minimalist vibe. Whether you’re crafting loungewear for home, festival fashion, or a one-of-a-kind outfit for your wardrobe, this project is both rewarding and stylish.
Crocheting pants might sound intimidating at first, but don’t worry—if you can make a granny square, you’re already halfway there. This guide will take you through every step, from choosing your materials to assembling and finishing your custom crochet pants.
Before we get into the tutorial, let’s go through the must-have supplies that will make your project easier and more enjoyable.
5 Essential Items to Buy Before You Start Crocheting Granny Square Pants
Before diving into how to crochet granny square pants, you’ll need to gather the right materials. Having the proper tools and yarn will ensure your pants turn out comfortable, durable, and perfectly fitted.
1. Crochet Hooks
Choose a 4mm (G-6) or 5mm (H-8) crochet hook for most medium-weight yarns. However, always check your yarn label for the recommended hook size. A comfortable, ergonomic hook is ideal for a big project like pants because you’ll be crocheting for several hours.
2. Yarn
The yarn you choose will determine how your pants look and feel. For granny square pants, cotton, acrylic, or a cotton-acrylic blend works best. Cotton gives structure and breathability, while acrylic offers softness and flexibility.
Pick multiple colors to create vibrant granny squares or choose monochrome tones for a minimalist design. Typically, you’ll need around 800–1200 grams of yarn depending on your size and desired length.
3. Yarn Needle
A yarn needle is essential for weaving in ends and sewing your granny squares together. A metal or plastic needle with a large eye makes it easy to thread thicker yarns.
4. Scissors
A small, sharp pair of scissors will make cutting yarn quick and clean. Avoid dull scissors, as they can fray your yarn ends.
5. Measuring Tape
Since crochet pants are wearable garments, getting the right measurements is crucial. A flexible measuring tape helps ensure a perfect fit at the waist, hips, and length.
Why Granny Square Pants Are So Popular
Granny square pants have made a huge comeback thanks to their vintage aesthetic and DIY charm. Celebrities, influencers, and crochet enthusiasts alike have embraced this retro trend because it’s both nostalgic and fashion-forward.
Here’s why everyone loves them:
- They’re customizable: You choose the colors, fit, and design.
- They’re beginner-friendly: You can make them square by square—no complicated patterns needed.
- They’re sustainable: Handmade clothing reduces fast fashion waste.
- They’re expressive: Each square tells a story through color and texture.
- They’re comfortable: Soft, flexible yarn makes these pants cozy for daily wear.
Now that you know why granny square pants are worth making, let’s learn exactly how to crochet them step by step.
Step-by-Step Guide: How to Crochet Granny Square Pants
This section will walk you through the entire process of making granny square pants—from crocheting the squares to assembling and shaping them into a stylish pair of pants.
Step 1: Take Your Measurements
Before you start crocheting, measure yourself or the person you’re making the pants for. You’ll need:
- Waist circumference
- Hip circumference
- Thigh circumference
- Inseam length (from crotch to ankle)
- Rise length (from waist to crotch)
Write these down—they’ll guide you in determining how many granny squares you’ll need and how big each should be.
Step 2: Crochet the Granny Squares
The foundation of how to crochet granny square pants lies in creating beautiful, even squares.
Basic Granny Square Pattern
- Start with a magic ring.
- Round 1: Chain 3 (counts as 1 double crochet), make 2 double crochets into the ring, chain 2, 3 double crochets, chain 2 three times. Join with a slip stitch to the top of the chain-3.
- Round 2: Slip stitch into the next 2 stitches and into the corner space. Chain 3, 2 double crochets, chain 2, 3 double crochets in the same corner. Chain 1, 3 double crochets, chain 2, 3 double crochets in the next corner. Repeat around. Join to top of chain-3.
- Round 3 and beyond: Continue building your square by adding groups of 3 double crochets separated by chain-1 spaces along sides and chain-2 at corners.
Make enough squares to fit around your body according to your measurements. Typically, for a medium-sized pair of pants, you’ll need about 40–60 squares depending on the square size.
Step 3: Choose Your Layout
Lay out your granny squares flat before joining. This helps you visualize the color pattern and design. You can alternate colors, create a gradient, or go full rainbow.
For pants, you’ll need:
- Front leg panels (each made of stacked squares)
- Back leg panels
- Two top waist panels
Arrange them to ensure symmetry before sewing.
Step 4: Join the Granny Squares
There are several ways to join granny squares together. Here are two popular options:
Option 1: Slip Stitch Join
Place two squares right sides together. Insert your hook through both loops of the edge stitches and slip stitch across. This creates a flat, subtle seam.
Option 2: Single Crochet Join
Hold squares together and work single crochets across the edge. This gives a slightly raised seam that adds texture and strength.
Join the squares to form two rectangular leg panels (front and back). Then, join both panels at the inner leg seam and outer seam.
Step 5: Shape the Pants
Once your leg panels are joined, you’ll need to form the crotch area and waistband.
- Lay both legs flat, right sides facing each other.
- Join at the inner thigh seam using slip stitches or single crochet.
- When you reach the crotch, shape the curve by slightly overlapping the center squares if needed.
- Join the front and back panels at the crotch area securely.
Now, you have the basic shape of your pants!
Step 6: Add the Waistband
A good waistband keeps your pants secure and adds comfort.
Attach your yarn to the top edge of the pants.
- Round 1: Single crochet evenly around the waist.
- Round 2–5: Continue single crocheting for several rows to form a thicker waistband.
- Optional: Weave an elastic band or drawstring through the waistband for a snug fit.
You can also use ribbed crochet stitches (front post and back post double crochets) for a stretchy, professional finish.
Step 7: Finish the Edges
To make your pants look neat, crochet a border around the ankle openings.
- Chain 1, single crochet evenly around the bottom edge.
- Slip stitch to close and cut the yarn.
Repeat on both legs.
Step 8: Weave in the Ends
Use your yarn needle to weave in all loose ends. This not only improves the appearance but also prevents unraveling.
Step 9: Block Your Pants
To ensure perfect shape and drape, block your pants:
- Lay them flat on a towel.
- Spray lightly with water or use steam from an iron (don’t press).
- Pin into shape and let dry completely.
Tips for Perfect Granny Square Pants
Here are some helpful tricks to make your crochet granny square pants turn out perfectly:
- Keep tension consistent to ensure squares are the same size.
- Count stitches carefully when joining squares for symmetry.
- Use soft, breathable yarn for comfort.
- Add a lining if you want more coverage or durability.
- Try them on frequently as you join squares to adjust the fit.
Fun Design Variations
Once you learn how to crochet granny square pants, you can play with endless styles:
1. High-Waisted Granny Pants
Add a few extra rounds to the waistband for a vintage high-rise look.
2. Wide-Leg Pants
Make larger squares or add extra rows for a flared leg design.
3. Patchwork Rainbow
Use different colors for each square to create a bold, festival-ready outfit.
4. Two-Tone Pants
Alternate between two complementary colors for a balanced, chic vibe.
5. Mini Shorts Version
Stop at mid-thigh length for cute crochet shorts—perfect for summer!
Troubleshooting Common Problems
My Pants Are Too Tight
Try using a larger hook size or adding more squares around the waist and hips.
The Squares Don’t Line Up
Block your squares before joining to make them even in size.
The Crotch Feels Uncomfortable
Slightly overlap the center squares or add an extra small triangle piece for comfort.
The Waistband Is Too Loose
Weave in elastic or add a drawstring to adjust the fit.
Creative Ways to Style Crochet Granny Square Pants
Your new granny square pants deserve to be shown off! Here are some fun styling ideas:
- Boho Festival Look: Pair them with a crochet crop top and sandals.
- Casual Daywear: Wear them with a simple tank or oversized shirt.
- Retro Chic: Match with a fitted turtleneck and platform boots.
- Beach Vibes: Throw them over a swimsuit as a cover-up.
- Cozy Home Look: Combine with a soft sweater for ultimate comfort.
Caring for Your Crochet Pants
To make your handmade pants last:
- Hand wash in cold water with mild soap.
- Avoid twisting or wringing.
- Lay flat to dry on a towel.
- Store folded, not hung, to maintain shape.
Frequently Asked Questions (FAQ)
How long does it take to make granny square pants?
Depending on your skill level and design complexity, it can take anywhere from 15 to 30 hours spread over several days.
Can beginners make crochet granny square pants?
Absolutely! If you know how to make basic granny squares and join them, this project is perfect for you.
What yarn is best for granny square pants?
Cotton or acrylic yarns are ideal—they’re soft, durable, and easy to wash.
How can I make my pants stretchier?
Use stitches like front post and back post double crochet in your waistband or blend elastic thread with your yarn.
Can I machine wash crochet pants?
Only if your yarn label says it’s machine washable. Otherwise, hand washing is safest.
How many granny squares do I need?
It depends on your measurements and square size. For most adult sizes, you’ll need between 40 and 60 squares.
Do I need to line my pants?
Lining is optional. Add a lightweight fabric lining for more coverage or if you’re using open-work granny squares.
Can I use leftover yarn?
Yes! Granny squares are perfect for using up scrap yarn, creating a colorful patchwork look.
Final Words
Learning how to crochet granny square pants is one of the most rewarding DIY fashion projects you can take on. It combines creativity, sustainability, and personal style into a single handmade masterpiece. Each square you make carries your unique touch, and when pieced together, they form a bold, expressive pair of pants that’s impossible to find anywhere else.
Don’t worry if your first pair isn’t perfect—crochet is all about experimenting, adjusting, and enjoying the process. The more you practice, the more confident you’ll become in shaping, joining, and designing. Soon, you’ll have not just pants but a wearable piece of art that reflects your love for handmade fashion.
So, gather your yarn, choose your favorite colors, and start stitching today. Once you slip into your custom granny square pants, you’ll feel the joy of wearing something truly one of a kind—crafted by you, for you.