
Crocheting is a beautiful blend of creativity, patience, and artistry. Among all the fun and colorful crochet motifs, the strawberry granny square is one of the most charming and unique designs you can make. It combines the traditional comfort of a granny square with the sweet and vibrant look of a strawberry. Whether you want to create a fruity blanket, a cute tote bag, or just a cheerful decoration, this pattern is perfect for adding a playful twist to your crochet projects.
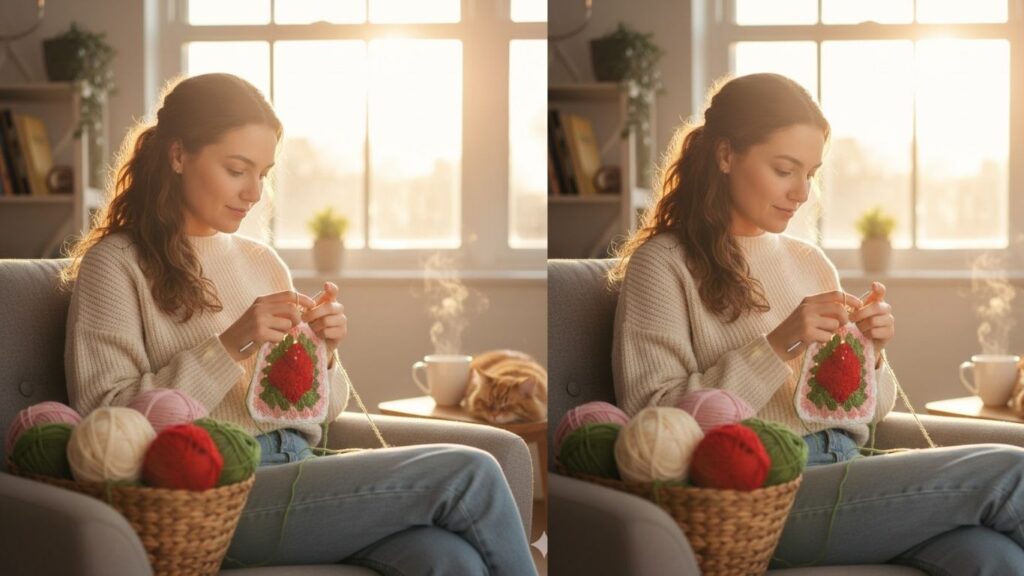
Learning how to crochet a strawberry granny square is both relaxing and rewarding. The design may look intricate, but with a bit of guidance, even beginners can master it. By combining simple stitches like double crochet, chain stitches, and color changes, you can crochet a bright, juicy strawberry right in the center of a square frame.
In this complete tutorial, we’ll go step-by-step through the process—from the tools and materials you need to detailed instructions and tips for perfecting your stitches. You’ll also discover fun ways to use your finished strawberry squares in creative projects.
Before jumping into the hands-on tutorial, let’s first go through a few essential supplies that will make your crocheting journey much smoother.
5 Essential Items to Buy Before You Start Crocheting a Strawberry Granny Square
If you want to learn how to crochet a strawberry granny square, having the right tools is the first step toward success. You don’t need fancy gadgets, just some basic yet reliable crochet supplies.
1. Crochet Hook
For strawberry granny squares, a 4mm (G-6) or 5mm (H-8) crochet hook works best. These sizes are perfect for medium-weight yarn and provide a comfortable grip for both beginners and experienced crocheters. Choose a hook with a smooth surface and ergonomic handle for long sessions of crocheting.
2. Yarn
You’ll need at least three colors of yarn for this pattern:
- Red or pink for the strawberry
- Green for the leaves and stem
- White or cream for the background (the square)
Choose medium-weight (worsted) yarn that’s soft, smooth, and easy to work with. Cotton or acrylic yarns are excellent choices for this kind of project because they hold their shape well and show off the details beautifully.
3. Stitch Markers
When working with color changes and shaping in crochet, stitch markers help you keep track of your rounds, corners, and stitch counts. They’re especially helpful when creating detailed motifs like strawberries.
4. Yarn Needle
You’ll use a yarn needle to weave in loose ends once you finish your square. It ensures your work looks neat and professional without visible tails.
5. Scissors
A small, sharp pair of scissors is essential for cutting yarn cleanly. Having a good pair will save time and prevent frayed ends.
Why You’ll Love Crocheting a Strawberry Granny Square
The strawberry granny square combines fun colors, creative design, and timeless crochet tradition into one beautiful piece. Once you know how to crochet a strawberry granny square, you’ll love how quickly it becomes your favorite motif.
Here’s why this pattern is so beloved among crocheters:
- It’s cheerful and vibrant: The bright red and green colors bring life to any project.
- It’s versatile: You can use it for blankets, clothing, bags, and more.
- It’s beginner-friendly: Even though it looks detailed, the pattern uses simple stitches.
- It’s perfect for scrap yarn: Use leftover yarn to make multiple colorful versions.
- It’s fun to customize: You can make mini strawberries or larger ones by adjusting the stitch count.
Getting Started: Understanding the Pattern
Before we dive into the full tutorial on how to crochet a strawberry granny square, let’s go over the key elements you’ll need to understand.
This pattern combines:
- A strawberry motif in the center (usually created with red yarn)
- Green leaves on top
- A granny square border surrounding the strawberry
You’ll work from the center outward, forming the strawberry first, then adding the leaves, and finally building the square border around it.
Make sure you know these basic crochet stitches before starting:
- Chain (ch)
- Slip stitch (sl st)
- Single crochet (sc)
- Half double crochet (hdc)
- Double crochet (dc)
If you’re comfortable with these, you’re ready to start.
Step-by-Step Guide: How to Crochet a Strawberry Granny Square
Now let’s go through the full, detailed tutorial. Take your time with each section, and remember—practice makes perfect!
Step 1: Make a Magic Ring
Start by creating a magic ring (also known as an adjustable ring). This will form the base of your strawberry.
- Wrap the red yarn around your fingers to form a loop.
- Insert your hook through the loop, yarn over, and pull up a loop.
- Chain 3 (this counts as your first double crochet).
This magic ring allows you to pull the center tight once the stitches are made, forming a neat, round center.
Step 2: Crochet the Strawberry Shape
- Into the magic ring, crochet 11 double crochets.
- Join with a slip stitch into the top of the chain-3 to close the circle.
- Pull the tail of the ring to tighten the center.
You now have a red circle that will form the strawberry’s base.
Next, we’ll shape it to look more like a strawberry.
- Chain 1, single crochet in the first stitch, half double crochet in the next stitch, double crochet in the next 3 stitches, treble crochet in the center stitch (this will be the bottom point of the strawberry).
- Then, mirror the pattern on the other side: double crochet 3 times, half double crochet once, single crochet once.
- Slip stitch to the first single crochet to close.
Now you have a strawberry shape—rounded at the top and pointed at the bottom.
Step 3: Add the Strawberry Seeds
To make the strawberry look realistic, add small “seeds” using yellow or white yarn.
- With a yarn needle, thread a short piece of yellow yarn.
- Make small stitches across the red area in a scattered pattern.
- Tie off and weave the ends into the back.
This little detail gives your strawberry its signature look!
Step 4: Crochet the Leaves and Stem
Now it’s time to add the green leafy top.
- Attach the green yarn to the top of the strawberry.
- Chain 4, then slip stitch into the same stitch to form one leaf.
- Repeat this around the top 4–5 times to make multiple leaves.
For the stem:
- Chain 5, then slip stitch back down the chain to create a short stalk.
This gives your strawberry its natural leafy crown.
Step 5: Turn the Strawberry into a Square
Now that your strawberry motif is done, it’s time to build the granny square around it.
Attach your white or cream yarn to the top right corner of the strawberry.
- Chain 3 (counts as the first double crochet).
- Double crochet once more in the same stitch, chain 1, then double crochet twice again in the next stitch to form your first corner.
- Chain 1, skip a stitch, and repeat around the strawberry, forming four corners and even sides.
If the strawberry shape curves inward, don’t worry—after a few rounds, the square will balance out.
Continue building up your square by adding traditional granny square rounds. For each new round:
- Chain 3, make 2 double crochets, chain 1, 3 double crochets into each corner space, and chain 1 between groups.
Step 6: Finishing Touches
Once your square reaches the desired size:
- Slip stitch to close the final round.
- Cut the yarn, leaving a tail about 6 inches long.
- Use your yarn needle to weave in all loose ends neatly.
If you want a cleaner look, lightly block your square by pinning it flat and spraying it with water or steam to help it hold its shape.
Tips for Perfecting Your Strawberry Granny Square
Even though this pattern is beginner-friendly, here are some extra tips to help you master how to crochet a strawberry granny square with professional results:
- Use bright yarns: Red, green, and white make your strawberry pop beautifully.
- Keep tension even: This ensures your stitches look uniform.
- Mark your corners: It’s easy to lose track when building the square.
- Use a slightly smaller hook for the strawberry: It gives the fruit a more defined shape.
- Experiment with size: You can make tiny strawberries or oversized ones depending on your project.
Creative Project Ideas Using Strawberry Granny Squares
Once you’ve learned how to crochet a strawberry granny square, you can use it in countless ways. Here are some creative ideas:
1. Strawberry Blanket
Make multiple strawberry granny squares and join them together to create a sweet, fruity blanket. Alternate with plain squares for balance.
2. Crochet Tote Bag
Combine your squares into a fun, summer-style tote bag. Use sturdy yarn and line the inside for durability.
3. Pillow Covers
Sew a few squares together to make cheerful cushion covers that brighten any room.
4. Table Runner or Placemats
Arrange your strawberry squares in rows for an adorable table set.
5. Clothing Accents
Use smaller squares as decorative patches on sweaters, tops, or even hats.
Troubleshooting Common Problems
The Strawberry Shape Looks Uneven
Make sure your stitches on both sides of the strawberry are symmetrical. Counting stitches carefully helps.
The Granny Square Isn’t Flat
If the edges curl, your tension might be too tight. Loosen your grip slightly or add one extra chain between groups.
The Strawberry Isn’t Centered
When starting the granny square border, make sure you evenly space your stitches around the strawberry.
The Seeds Are Too Big or Uneven
Use thinner yarn or embroidery thread for more delicate seed stitches.
How to Join Strawberry Granny Squares
When you have several squares completed, you can join them using one of these methods:
Slip Stitch Join
Hold two squares together, right sides facing each other, and slip stitch through both loops of each stitch across.
Single Crochet Join
Work single crochet stitches along the edge of each square, joining them together with visible ridges for texture.
Invisible Join
Use a yarn needle to sew squares together with whip stitches, hiding the seams for a seamless finish.
Caring for Your Crochet Projects
To keep your strawberry granny squares and finished projects looking fresh:
- Hand wash gently with mild detergent.
- Avoid wringing or twisting your crochet items.
- Lay flat to dry on a towel.
- Store folded crochet pieces in a cool, dry place.
Frequently Asked Questions (FAQ)
How long does it take to crochet a strawberry granny square?
For beginners, it usually takes around 45 minutes to 1 hour to make one square. Once you’re experienced, you can complete one in about 30 minutes.
Can I use different colors for the strawberry?
Yes! Pink or pastel strawberries look adorable too. You can even make rainbow strawberries for a fun twist.
What yarn weight should I use?
Medium-weight yarn (also known as worsted or category 4) works best for this project. It holds the shape well and shows detail beautifully.
Do I have to use a magic ring?
While the magic ring gives a clean start, you can also chain 4 and join into a loop if you prefer.
How can I make my squares the same size?
Count your stitches and make sure your tension is consistent across all squares. Blocking your finished pieces will also help maintain uniform size.
Can I make a rectangle instead of a square?
Yes, simply add more rows on the top and bottom of your square to elongate it into a rectangle shape.
How do I make the strawberry bigger?
Add more stitches in the base circle (for example, 14–16 double crochets instead of 11) and adjust your shaping accordingly.
Final Words
Learning how to crochet a strawberry granny square is one of the most delightful ways to bring color and creativity into your crochet journey. It’s a cheerful pattern that blends traditional techniques with a touch of whimsy. The combination of bright red strawberries, green leaves, and the classic granny square structure creates something truly special—perfect for both beginners and seasoned crocheters.
Once you make your first strawberry square, you’ll find it hard to stop. Each one turns out a little different, giving your finished project a unique handmade charm. Whether you’re crafting a blanket, a pillow cover, or a bag, your strawberry granny squares will spread sweetness wherever they go.
So grab your yarn, pick up your hook, and start stitching your very own crochet strawberries today. With patience, creativity, and a little practice, you’ll soon master this adorable design—and maybe even inspire others to do the same.