
Braided bow hairstyles are creative, elegant, and surprisingly easy to achieve with the right technique. Whether you are styling hair for school, parties, weddings, or everyday looks, learning how to make a bow with braids adds charm and uniqueness to any hairstyle. These braided bows look detailed and stylish but can be done at home with simple tools.
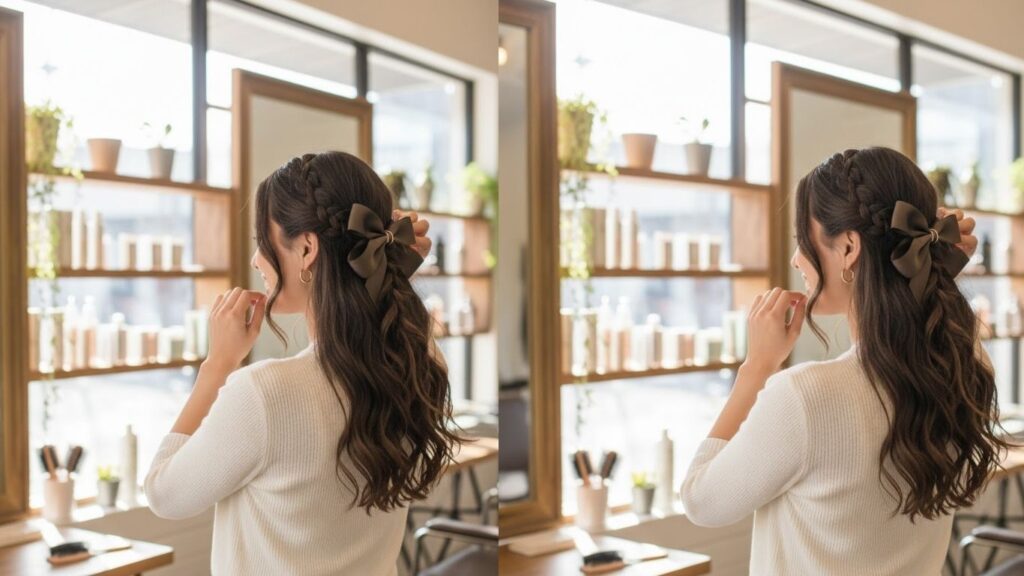
In this guide, you will discover seven different braided bow styles explained step by step. Each method is beginner-friendly and designed to help you create beautiful hair bows using braids of different types and textures.
Hair Tools and Products You May Need
- Hair elastics
- Bobby pins
- Rat tail comb
- Hair spray
- Braiding hair extensions
Before You Start Styling
Creating a bow with braids works best on smooth, detangled hair. Start by brushing thoroughly and removing knots. If your hair is very soft or slippery, apply a light styling product for better grip. For thicker or longer bows, you may use hair extensions that match your natural color.
Choose the position of your braided bow before beginning. It can be placed at the top of the head, back of the head, or side. Planning placement helps achieve symmetry and balance.
How to Make a Bow with Braids
A braided bow is created by forming loops using braided sections of hair and securing them carefully. The key to success is neat parting, balanced loops, and strong pinning to hold the shape in place.
Now, let’s explore seven detailed ways to create a bow with braids.
1. Classic Braided Hair Bow
A simple and elegant style suitable for beginners.
Step-by-Step Instructions
- Gather hair into a high ponytail and secure with an elastic.
- Divide the ponytail into three equal sections.
- Braid each section separately and secure ends with small elastics.
- Take two braided sections and fold each into a loop shape.
- Pin the loops securely on both sides to form the bow.
- Use the third braid to wrap around the center of the loops.
- Pin the center braid underneath to secure the bow.
This style creates a structured bow that looks neat and polished.
2. French Braid Bow
This style incorporates a French braid leading into the bow.
Step-by-Step Instructions
- Begin a French braid at the crown of your head.
- Continue braiding until you reach the back of the head.
- Secure into a ponytail.
- Divide the ponytail into two sections and braid each.
- Form loops using each braid and pin securely.
- Wrap a small braided section around the center.
- Spray lightly to hold the shape.
French braid bows are ideal for formal events and school functions.
3. Dutch Braid Bow
A bold variation using raised braids.
Step-by-Step Instructions
- Create a Dutch braid starting from the front hairline.
- Continue until reaching the desired bow placement.
- Tie into a ponytail.
- Divide ponytail into two thick sections.
- Braid both sections tightly.
- Shape each braid into a loop and secure with pins.
- Use a thin braid to cover the center and secure.
Dutch braid bows appear more prominent because the braid sits on top of the hair.
4. Half-Up Braided Bow
Perfect for medium-length hair.
Step-by-Step Instructions
- Take the top half of your hair and secure into a ponytail.
- Divide the ponytail into three sections.
- Braid two side sections and leave the center loose.
- Loop the two braids into bow shapes.
- Pin loops firmly in place.
- Wrap the loose center hair around the bow center.
- Secure with pins and adjust for balance.
This style keeps hair flowing while highlighting the bow detail.
5. Side Braided Bow
A romantic and playful look.
Step-by-Step Instructions
- Sweep hair to one side and secure into a side ponytail.
- Divide ponytail into two or three sections.
- Braid each section evenly.
- Form loops from two braids and pin to create the bow.
- Use remaining braid to wrap around the center.
- Secure underneath with pins.
- Gently pull braid edges for a fuller look.
Side braided bows are ideal for casual outings and parties.
6. Fishtail Braid Bow
Adds texture and intricate detail.
Step-by-Step Instructions
- Gather hair into a ponytail.
- Divide into two sections for a fishtail braid.
- Take small strands from each side alternately to braid.
- Secure the fishtail braid with an elastic.
- Fold the braid into two loops.
- Pin loops carefully to form the bow.
- Wrap a small hair section around the center.
Fishtail braid bows look detailed and stylish.
7. Double Braided Bow
A dramatic style using multiple braids.
Step-by-Step Instructions
- Create two ponytails close together.
- Braid each ponytail into two braids (four braids total).
- Use two braids to form one loop and two for the other loop.
- Pin loops tightly to create a large bow shape.
- Take a small braid to wrap around the center.
- Secure everything firmly with pins.
- Adjust loops evenly and apply hairspray.
This bold style works well for special events or performances.
Tips for Making a Perfect Braided Bow
- Keep braids tight for better structure.
- Use strong bobby pins for security.
- Match elastics to hair color.
- Gently loosen braid edges for volume.
- Practice loop shaping for symmetry.
Attention to small details makes the hairstyle look professional.
Styling Ideas for Braided Bows
Braided bows work beautifully for:
- School hairstyles
- Birthday parties
- Weddings
- Dance performances
- Holiday celebrations
- Photo sessions
You can accessorize with small clips or decorative pins for extra charm.
Common Mistakes to Avoid
- Making loops uneven
- Using too few pins
- Braiding too loosely
- Skipping hairspray
- Not planning bow placement
Careful preparation helps achieve the best results.
Frequently Asked Questions
Can I make a braided bow on short hair?
Yes, but longer hair makes it easier. Extensions can help create fuller bows.
How long does a braided bow last?
With proper pinning and hairspray, it can last an entire day.
Is this hairstyle suitable for kids?
Yes, braided bows are popular for children and teens.
Do I need professional tools?
No, basic hair elastics and pins are enough.
Can I add accessories?
Yes, small decorative clips or pearls enhance the look.
Final Words
Learning how to make a bow with braids is a creative way to elevate everyday hairstyles. With practice and patience, you can master different styles that suit various occasions.
Experiment with braid types, placements, and sizes to create unique designs. Braided bows are charming, stylish, and sure to make any hairstyle stand out beautifully.