
Giant paper flowers are a beautiful and impactful way to decorate parties, events, weddings, backdrops, photo zones, and even your home. Their oversized petals and vibrant colors instantly catch the eye and bring any space to life with charm and creativity.
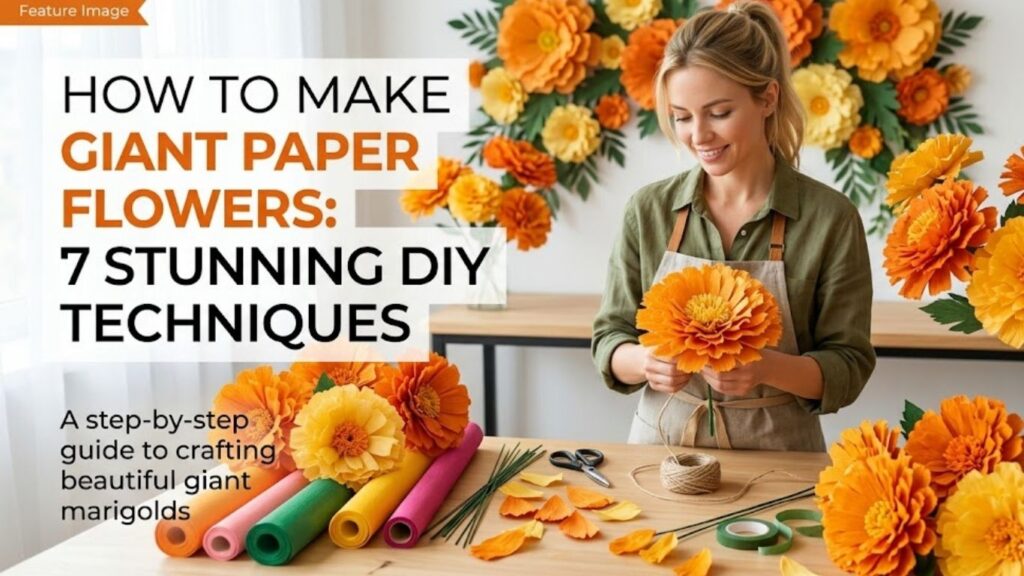
In this guide, you will learn several step-by-step methods to make giant paper flowers that look professional yet are simple enough for beginners. With easy instructions and helpful tips, you’ll be creating show-stopping floral décor in no time.
Supplies to Get Started
Essentials to Buy
- Crepe paper rolls (varied colors)
- Floral wire (heavy duty)
- Hot glue sticks
- Jumbo scissors
- Cardstock sheets
Giant Paper Flowers
Giant paper flowers are larger than standard paper flowers and require techniques that help create structure, volume, and durability. Below are seven awesome methods to make giant paper flowers with step-by-step instructions and detailed explanations you can follow easily.
1. Classic Giant Tissue Flower Method
This technique uses layered tissue paper to build a big, fluffy flower that’s perfect for party decorations.
Step 1: Cut Large Tissue Sheets
Take 10–15 sheets of tissue paper. Cut them into equal rectangles approximately 20–24 inches long by 12–16 inches wide. The size of the rectangle determines how big the finished flower will be.
Step 2: Stack the Sheets Neatly
Stack all the cut sheets on top of each other, aligning the edges carefully so they create one thick bundle.
Step 3: Fold Like a Fan
Starting at one short end, fold the paper stack back and forth in an accordion style. Each fold should be roughly 2–3 inches wide. Keep the folds tight and even for the best look.
Step 4: Cut Rounded Petal Edges
Before you secure the center, round off both ends of the folded stack with scissors. Rounding the edges gives each petal a soft, curved look instead of a sharp point.
Step 5: Tie the Center
Take a piece of floral wire or string and tie it tightly around the center of the folded bundle. Twist the wire until it is firmly secure.
Step 6: Gently Unfold the Layers
Starting with the top layer, carefully pull each sheet upward and outward. Slowly work layer by layer until you have a full, fluffy bloom.
Step 7: Fluff and Shape
Once all layers are opened, adjust the petals with your fingers to give the flower a rounded, natural shape.
This classic method creates a giant, soft, pom-pom-style flower that looks amazing in clusters or as stand-alone décor.
2. Crepe Paper Giant Peony Style
Crepe paper adds texture that resembles real petals of flowers like peonies or roses.
Step 1: Cut Petal Strips
Cut strips of crepe paper that are 24–30 inches long and 6–8 inches wide. Crepe paper’s stretch allows the strips to curve naturally, giving petals a real flower feel.
Step 2: Create Petal Shapes
Take each strip and fold it slightly in half lengthwise. Trim the edges into petal shapes—tall, pointed, rounded, or wavy based on the style you want.
Step 3: Stretch and Shape Petals
Gently stretch the center of each petal piece with your fingers. This adds a slight curve and natural wave to the petals.
Step 4: Build the Flower Base
Use a piece of cardboard or a floral foam ball as the base. Wrap floral wire around it to create a stem if needed.
Step 5: Apply Glue and Attach
Starting from the base, apply hot glue to the bottom of each petal and press it onto the base. Work in a circular pattern.
Step 6: Layer Petals Densely
Continue adding petal layers outward, slightly overlapping each row so the flower becomes full and rich.
Step 7: Finish the Center
Add a special center piece like a fringed paper ball, rolled crepe swirl, or a cluster of tiny folded petals.
This method creates elegant giant flowers that resemble peonies or garden roses with lots of depth and layers.
3. Cardstock Spiral Flower Technique
Using cardstock makes structures more stable and allows for dramatic shapes and crisp edges.
Step 1: Draw a Spiral on Cardstock
Draw a large circle on a piece of cardstock. Inside that circle, draw a continuous spiral path that goes toward the center.
Step 2: Cut Along the Spiral Line
Using sharp scissors, carefully cut along the spiral line you drew. You should end up with one long, spiraled strip attached at the center.
Step 3: Curl the Paper
Use a pencil or dowel to curl the outer edge of the strip slightly, creating a curved petal look.
Step 4: Start Rolling From the Outside
Begin rolling the spiral inward from the outer edge. As you roll, keep the paper tight at first, then loosen slightly as you move toward the center.
Step 5: Secure the Base
Once fully rolled, let go so the flower blooms outward slightly. Place a dollop of hot glue at the base to secure the shape.
Step 6: Attach a Stem (Optional)
If you want a stem, glue a wooden dowel or floral wire to the bottom of the flower and wrap with floral tape.
Step 7: Add Petal Details
Gently separate and adjust layers by hand. You can also add crepe paper under the cardstock to soften the look.
This spiral technique gives a modern stylized giant paper flower and works beautifully for backdrops or wall art.
4. Rolled Crepe Paper Rosette Method
A rolled rosette creates a rose-like giant flower with balanced petals and a striking center.
Step 1: Cut a Long Strip of Crepe Paper
Cut a long piece of crepe paper about 4–5 feet long and 2–3 inches wide.
Step 2: Fringe One Side Deeply
Cut long fringes along one side of the strip. Keep the cuts about 1 inch apart, creating a fringe border.
Step 3: Start Rolling from One End
Take the uncut edge and begin rolling it tightly. Continue rolling, allowing the fringes to fan out.
Step 4: Spread Petals While Rolling
As you roll, gently pull the fringed edges outward to mimic blooming petals.
Step 5: Stop and Secure
When you reach the end of the strip, secure the base with hot glue.
Step 6: Adjust Petal Layers
Use your fingers to move petal fringes outward and fluff them for volume.
Step 7: Add Floral Tape
Wrap floral tape around the base and stem area for a finished look.
This rolled method produces a full, rounded flower that’s dramatic and elegant.
5. Giant Paper Lily Style
Lily flowers are known for their long petals and structured form. This method gives a unique style in giant format.
Step 1: Cut Large Petal Shapes
Cut 6–10 large petals from heavy cardstock or thick crepe paper. Petals should be long and slender with a slight curve.
Step 2: Shape Petals
Stretch the paper slightly in the middle of each petal to give it a natural curve.
Step 3: Make a Sturdy Base
Use a circular cardboard disc as the base and punch holes where each petal will attach.
Step 4: Attach First Petal Set
Use hot glue to attach every other petal around the base, forming the first layer.
Step 5: Add the Second Petal Set
Fill in the gaps with the remaining petals. This crisscross pattern gives a full, layered look.
Step 6: Create the Stamen
Cut thin strips of yellow or orange paper and fringe them. Twist a few strands together to form the center stamen.
Step 7: Assemble the Center
Glue the stamen in the center of your flower. Adjust petal curves for realism.
This style is perfect for tropical-themed décor or special event backdrops.
6. Fringe Paper Giant Flower Style
Fringing adds dimension and fullness, creating textured giant blooms.
Step 1: Cut Wide Fringed Strips
Cut paper strips that are 20–30 inches long and 4–6 inches wide. Fringe only one side with close cuts.
Step 2: Create a Center Core
Use a small ball of crumpled paper or tissue as the core of the flower.
Step 3: Start Wrapping
Attach the fringe strip to the core with hot glue, wrapping it around tightly.
Step 4: Continue Wrapping Down
Add more fringe strips as needed. Work outward and downward until the flower reaches the desired size.
Step 5: Fluff the Fringe
Use your fingers to spread the fringed edges outward.
Step 6: Double Layer
For extra fullness, wrap a second layer of fringed strips around the first.
Step 7: Add Stem and Leaves
Wrap floral wire with tape and attach leaves made from green paper.
Fringed flowers have a whimsical texture perfect for photo walls, party décor, and bold centerpieces.
7. Accordion Fold Giant Dahlia Technique
Dahlias have many tight petals, and this accordion method mimics that layered style beautifully.
Step 1: Cut Multiple Paper Strips
Cut strips of crepe or tissue paper about 2 inches wide and 24–30 inches long. You’ll need lots of strips.
Step 2: Accordion Fold Each Strip
Fold each strip like an accordion. Keep folds tight and even.
Step 3: Tie at Center
Tie each folded strip at the center with floral wire.
Step 4: Fan Out Petals
Gently spread folded layers outward so they form a flower shape.
Step 5: Build Fullness
Attach multiple accordion pieces side by side on a stem or base.
Step 6: Secure With Glue
Use hot glue at the base of each accordion cluster.
Step 7: Shape and Adjust
Once all pieces are attached, adjust petals for a rounded, uniform look.
This technique gives a detailed, textured flower with many individual petals.
Display and Decoration Ideas
Once your giant paper flowers are made, here are ways to use them:
- Photo backdrop walls
- Wedding arches
- Party tables
- Nursery décor
- Window displays
- Event signage
- Gift toppers
- Hanging garlands
Color and Paper Selection Tips
Choosing the right paper and colors makes a big difference.
Best Paper Types
- Crepe paper for realistic texture
- Tissue paper for soft, fluffy blooms
- Cardstock for structure and crisp edges
Choosing Colors
- Use complementary shades for depth
- Metallic paper adds shimmer
- Pastels for soft décor
- Bright hues for celebrations
Tools and Safety Tips
Handy Tools
- Wire cutters for sturdy stems
- Bone folder for shaping petals
- Ruler and pencil for measurements
- Craft mat to protect surfaces
Safety Tips
- Work on a flat surface
- Keep hot glue away from children
- Cut slowly to avoid mistakes
- Store extra paper neatly
Frequently Asked Questions
What paper is best for giant flowers?
Crepe and tissue paper are most common; cardstock works for structured petals.
How long does it take per flower?
Depending on size and method, 20 minutes to 2 hours.
Can I reuse the flowers?
Yes, keep them in a dry place and handle gently.
How big can I make the flowers?
Some reach 3–4 feet wide for dramatic backdrops.
Are these suitable for outdoor use?
Use weather-resistant paper and avoid moisture.
Final Words
Giant paper flowers are a flexible and beautiful craft that brings wow factor to décor and celebrations. With simple materials and creative techniques, you can make stunning floral arrangements that look professional and unique.
Try different styles, play with colors, and have fun creating large flowers that express your creativity and brighten any space.