
A paper flower bouquet is a timeless, creative gift that never fades. Whether you’re preparing for a birthday, wedding, anniversary, or home decoration, handmade paper bouquets add a personal and heartfelt touch to any occasion.
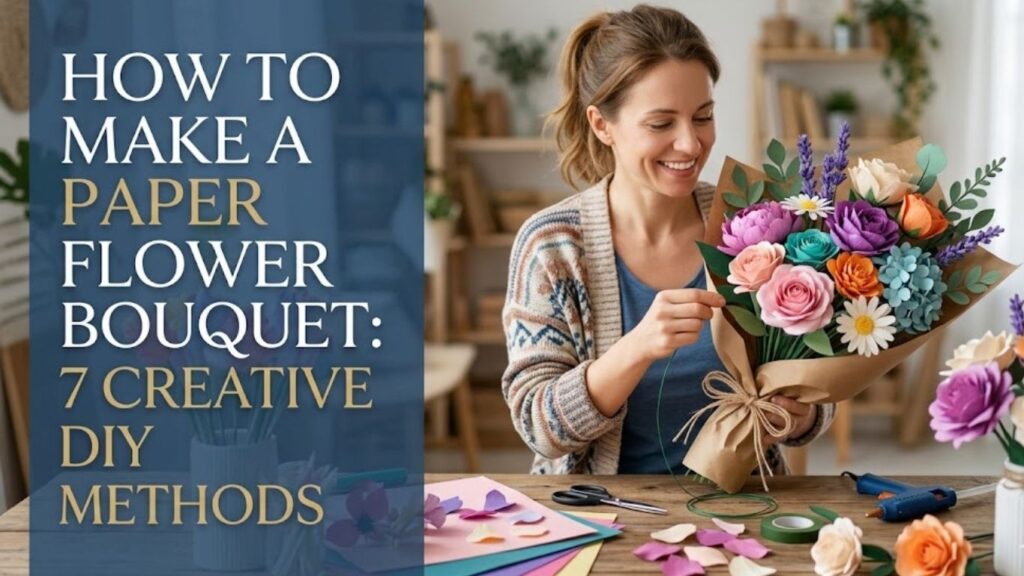
In this complete guide, you will discover simple, creative, and detailed ways to make stunning paper flower bouquets step by step. With patience and the right techniques, you can design professional-looking bouquets from basic craft supplies.
Essential Supplies for Making Paper Flower Bouquets
Before starting your bouquet project, preparing the right materials will make the process easier and more enjoyable.
5 Items to Buy
- Colored crepe paper
- Floral wire stems
- Green floral tape
- Hot glue sticks
- Wrapping paper sheets
Preparation Tips Before You Begin
Creating a paper flower bouquet requires planning. First, decide the bouquet theme—romantic, pastel, bright, or natural. Choose matching paper colors and wrapping material. Measure the size of your bouquet based on the occasion. Prepare a clean workspace and test one flower before creating multiple pieces. This helps ensure consistency in size and design.
Paper Flower Bouquet
A paper flower bouquet is a collection of handmade paper flowers arranged beautifully and wrapped like a traditional floral arrangement. Unlike fresh flowers, paper bouquets last for years and can be customized in endless styles. Below are seven detailed methods you can follow to create unique bouquet designs.
1. Classic Tissue Paper Rose Bouquet
This is one of the most popular and beginner-friendly bouquet styles.
Step 1: Cut Tissue Paper Circles
Cut 6–8 round pieces of tissue paper for each rose. Each circle should be about 4–5 inches wide.
Step 2: Stack and Shape Petals
Stack the circles evenly. Pinch the bottom center slightly to give the paper a petal shape.
Step 3: Insert Floral Wire
Push a floral wire through the center bottom and twist to secure tightly.
Step 4: Wrap With Floral Tape
Wrap green floral tape around the base and along the wire to create a realistic stem.
Step 5: Shape Each Petal
Gently separate each layer and curl the edges outward using your fingers.
Step 6: Make Multiple Roses
Repeat the process to create 8–12 roses depending on bouquet size.
Step 7: Arrange and Wrap
Gather all roses together, adjust height levels, wrap with decorative paper, and tie with ribbon.
This bouquet is soft, romantic, and perfect for gifting.
2. Crepe Paper Tulip Bouquet
Tulips are elegant and simple, making them great for modern bouquets.
Step 1: Cut Oval Petals
Cut 3 oval-shaped petals for each tulip using crepe paper.
Step 2: Stretch the Center
Gently stretch the middle of each petal to create a natural curve.
Step 3: Create the Flower Center
Roll a small piece of yellow paper tightly and glue it to a floral wire.
Step 4: Attach Petals Around Center
Glue each petal around the center roll, overlapping slightly.
Step 5: Secure With Floral Tape
Wrap tape around the base and stem for support.
Step 6: Add Paper Leaves
Cut green leaf shapes and attach them to the stem.
Step 7: Assemble Bouquet
Combine 10–15 tulips and wrap in kraft paper for a clean, stylish look.
This bouquet style is perfect for spring decorations.
3. Paper Daisy Bouquet
Daisies add a cheerful and fresh appearance.
Step 1: Cut Petal Strips
Cut long white strips and fringe one side to create thin petals.
Step 2: Make Yellow Centers
Roll yellow paper tightly into small circles.
Step 3: Wrap Petal Strip Around Center
Glue the fringed strip around the yellow center.
Step 4: Attach Stem
Insert floral wire at the base and secure with glue.
Step 5: Shape Petals
Spread the fringed petals outward evenly.
Step 6: Add Leaves
Attach green paper leaves along the stem.
Step 7: Arrange Bouquet
Combine daisies with greenery and wrap neatly.
This bouquet feels light and joyful.
4. Layered Cardstock Flower Bouquet
Cardstock flowers are sturdy and bold.
Step 1: Draw Flower Templates
Draw simple five-petal flower shapes in three sizes.
Step 2: Cut Multiple Layers
Cut each size several times.
Step 3: Stack Layers
Layer from largest to smallest and glue in the center.
Step 4: Add Button Center
Glue a decorative paper circle in the middle.
Step 5: Attach Stem
Glue floral wire to the back and cover with green paper.
Step 6: Create Several Flowers
Make at least 7–9 layered flowers.
Step 7: Wrap as Bouquet
Arrange in a round shape and wrap with decorative paper.
This bouquet works well for home décor and photo props.
5. Giant Paper Flower Bouquet
For dramatic effect, create oversized flowers.
Step 1: Cut Large Petals
Cut 8–10 large petal shapes from crepe paper.
Step 2: Curl Petal Edges
Use scissors or a pencil to curl the edges outward.
Step 3: Create Strong Base
Use thick cardboard circle as base.
Step 4: Glue Petals in Circle
Attach petals evenly around the base.
Step 5: Add Inner Layers
Add smaller petals toward the center.
Step 6: Attach Thick Stem
Secure a strong wire or wooden stick.
Step 7: Combine 3–5 Large Flowers
Wrap carefully for a bold bouquet design.
This bouquet makes a powerful visual statement.
6. Rolled Spiral Paper Flower Bouquet
Spiral flowers are elegant and easy.
Step 1: Draw Spiral on Paper
Draw a large spiral inside a circle.
Step 2: Cut Along Spiral
Carefully cut the spiral shape.
Step 3: Roll from Outside In
Roll tightly from outer edge toward center.
Step 4: Secure Base
Glue the bottom to hold shape.
Step 5: Attach Stem
Glue floral wire underneath.
Step 6: Make Various Sizes
Create different sized spiral flowers.
Step 7: Arrange and Wrap
Combine tightly for a neat bouquet finish.
This bouquet looks modern and stylish.
7. Mixed Flower Paper Bouquet
A mixed bouquet adds variety and texture.
Step 1: Choose 3 Flower Styles
Combine roses, daisies, and tulips.
Step 2: Prepare Each Flower Type
Follow earlier methods carefully.
Step 3: Balance Heights
Place taller flowers at the back.
Step 4: Add Greenery
Include paper leaves or filler branches.
Step 5: Adjust Shape
Hold flowers together and adjust symmetry.
Step 6: Secure Stems
Wrap stems tightly with tape.
Step 7: Wrap and Decorate
Use decorative paper and ribbon for final touch.
Mixed bouquets look natural and impressive.
Bouquet Arrangement Tips
Balance Colors
Mix light and dark shades for depth.
Use Odd Numbers
Odd numbers of flowers look more natural.
Add Filler Elements
Paper leaves, small buds, or grass add fullness.
Secure Tightly
Wrap stems firmly to avoid shifting.
Creative Wrapping Ideas
- Kraft paper wrap
- Transparent cellophane
- Fabric wrap
- Lace ribbon accent
- Twine tie finish
Care and Storage Tips
Keep your paper bouquet away from moisture and direct sunlight. Store in a dry place to maintain shape. If petals bend, gently reshape them with your fingers.
Frequently Asked Questions
How many flowers should be in a bouquet?
Usually 7–15 flowers depending on size.
Which paper is best?
Crepe paper for realism, cardstock for structure.
Can children make paper bouquets?
Yes, with supervision when using scissors or glue.
How long does a paper bouquet last?
With proper care, it can last for years.
Is hot glue necessary?
It helps secure flowers strongly but craft glue can also work.
Final Words
Making a paper flower bouquet is a creative and meaningful craft that anyone can enjoy. With simple tools and patience, you can design beautiful arrangements that last forever.
Experiment with different flower styles, colors, and wrapping techniques to create unique bouquets that reflect your personal style and brighten every special moment.