
Hibiscus flowers are known for their vibrant colors and tropical charm. Making them from paper allows you to enjoy their beauty year-round without worrying about wilting or seasonal availability. Paper hibiscus flowers are perfect for home décor, gifts, or crafting projects.
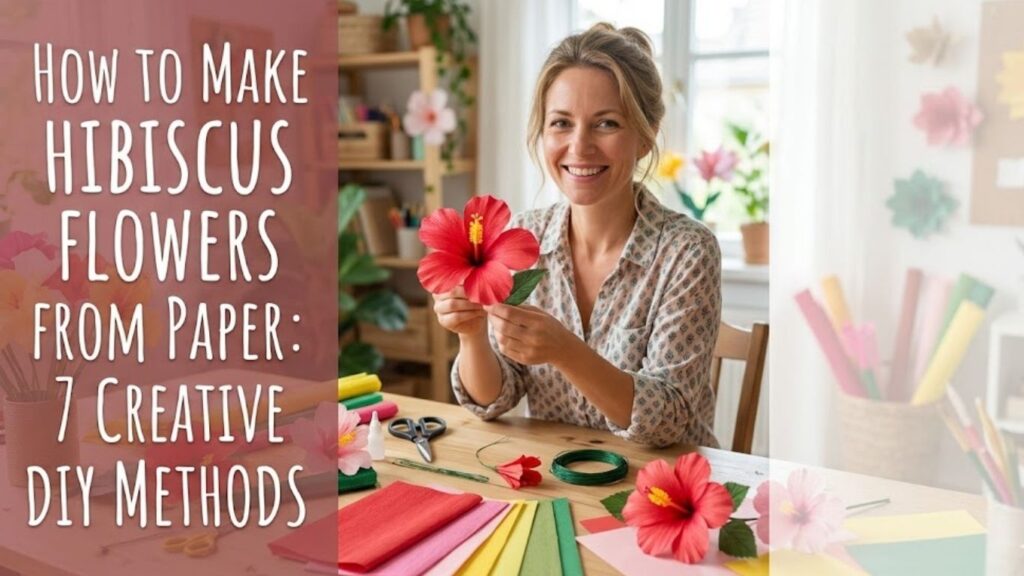
Before starting, having the right materials on hand ensures a smooth and enjoyable crafting experience.
Suggested Items to Buy
- Colored crepe paper
- Floral wire
- Glue gun
- Scissors
- Floral tape
Paper Hibiscus Flower Ideas
Creating paper hibiscus flowers can be done in multiple ways, each with unique techniques and effects. Here are seven creative methods to make realistic and decorative hibiscus flowers.
1. Classic Crepe Paper Hibiscus
This method uses soft crepe paper to mimic the natural curves of hibiscus petals.
Materials Needed
- Red, pink, or orange crepe paper
- Green floral tape
- Floral wire
- Scissors
- Glue
Step-by-Step Instructions
- Cut five large petal shapes from the crepe paper.
- Stretch the center of each petal slightly to give it a natural curve.
- Take a piece of floral wire for the stem and attach one petal at a time using glue.
- Overlap petals slightly as you go to create a full flower look.
- Twist the base of petals and cover with green floral tape.
- Make the stamen by rolling a small strip of yellow or orange crepe paper, attaching it at the center.
- Repeat the process to make multiple hibiscus flowers and arrange them in a bouquet.
2. Layered Cardstock Hibiscus
Using cardstock gives your flowers a more structured and lasting form.
Materials Needed
- Colored cardstock
- Scissors
- Floral wire
- Glue
- Green tape
Step-by-Step Instructions
- Cut five identical petal shapes from the cardstock.
- Score lightly at the base to allow a slight fold for a natural petal curve.
- Glue petals around the floral wire, slightly overlapping each.
- Cut a small yellow circle for the stamen base and glue at the flower center.
- Roll a thin strip of yellow cardstock to form stamen filaments and attach.
- Wrap the stem with green floral tape.
- Create multiple flowers in different colors for variety and arrange them as desired.
3. Watercolor Paper Hibiscus
Watercolor paper adds texture and a painted look to your hibiscus flowers.
Materials Needed
- Watercolor paper
- Watercolor paints
- Scissors
- Floral wire
- Glue
Step-by-Step Instructions
- Paint your paper with soft hibiscus colors and allow to dry.
- Cut five petal shapes, keeping slight curves.
- Slightly curl the edges of petals with your fingers.
- Attach each petal to a floral wire with glue.
- Make the stamen by rolling a thin paper strip and coloring it yellow.
- Wrap the wire stem with floral tape.
- Combine several flowers in a vase or a paper bouquet.
4. Tissue Paper Hibiscus Flower
Tissue paper creates delicate, lightweight flowers ideal for decorations or party décor.
Materials Needed
- Colored tissue paper
- Scissors
- Glue
- Floral wire
- Green tape
Step-by-Step Instructions
- Cut five tissue paper petals per flower.
- Slightly stretch and curl the edges for a natural look.
- Glue petals onto floral wire in a circular arrangement.
- Make a small paper stamen and attach it in the center.
- Wrap the stem with green floral tape.
- Repeat for multiple flowers to create a soft, airy bouquet.
- Adjust the petals for a fuller, realistic appearance.
5. Folded Origami Hibiscus
Origami hibiscus uses folding techniques for a structured and elegant look.
Materials Needed
- Origami paper or thin colored paper
- Scissors
- Floral wire
- Glue
Step-by-Step Instructions
- Start with a square paper and fold diagonally to form creases.
- Fold each corner to the center to form the base petal shapes.
- Unfold slightly and curl the tips for a natural effect.
- Attach each folded petal to the floral wire with glue.
- Make a rolled stamen from thin paper and attach at the center.
- Wrap the wire stem with green floral tape.
- Combine several origami hibiscus flowers for a decorative arrangement.
6. Ruffled Crepe Paper Hibiscus
Adding ruffles creates a fuller and more textured hibiscus flower.
Materials Needed
- Crepe paper in your chosen color
- Scissors
- Glue
- Floral wire
- Green tape
Step-by-Step Instructions
- Cut five petal shapes slightly wider at the ends.
- Fringe or crinkle the edges to add ruffle texture.
- Stretch the petals lightly to create curves.
- Glue each petal onto floral wire one by one.
- Make stamen using a small strip of yellow crepe paper.
- Wrap the floral wire with green tape.
- Arrange flowers in a bouquet with alternating ruffled and smooth petals.
7. Jumbo Hibiscus Paper Flower
A large, statement flower perfect for wall décor or event backdrops.
Materials Needed
- Large sheets of crepe or cardstock
- Scissors
- Floral wire
- Glue gun
- Green floral tape
Step-by-Step Instructions
- Cut five oversized petals from paper.
- Curl and shape the petals carefully to create a natural curve.
- Glue the petals around the floral wire stem.
- Make a large stamen with rolled yellow paper and attach at the center.
- Wrap the stem with green tape to hide the wire.
- Make multiple jumbo hibiscus flowers for a dramatic display.
- Mount on walls or combine in a large bouquet for a tropical effect.
Additional Tips for Paper Hibiscus Flowers
- Use multiple shades for a realistic gradient effect.
- Adjust petal sizes for variety and natural flow.
- Add leaves or smaller filler flowers for a complete arrangement.
- Experiment with paper textures like crepe, tissue, and cardstock.
- Store in a dry place to maintain shape and color.
Frequently Asked Questions (FAQ)
Can I use regular paper for hibiscus flowers?
Yes, but crepe paper or cardstock provides better texture and shape.
How do I make hibiscus flowers look more realistic?
Curl and stretch the petals, use gradients of color, and add detailed stamen for a natural look.
Can I make scented paper hibiscus flowers?
You can spray light floral fragrance or essential oils on the petals to mimic the scent of real hibiscus.
How long do paper hibiscus flowers last?
If kept dry and away from direct sunlight, paper hibiscus flowers can last for years.
What tools are essential for beginners?
Scissors, glue, floral wire, floral tape, and colored crepe or cardstock are enough to start.
Final Words
Making hibiscus flowers from paper is a fun, creative, and rewarding craft. By following these seven methods, you can produce vibrant, realistic flowers that last indefinitely. These paper hibiscus flowers are perfect for gifting, home décor, or special events. Experiment with colors, sizes, and textures to create your ideal tropical bouquet that adds beauty and charm to any space.