
Suncatcher stickers are beautiful DIY decorations that capture sunlight and fill your space with colorful light. They are perfect for windows, glass doors, mirrors, skylights, and even sunlit corners in bedrooms or workspaces. Making your own suncatcher stickers at home is fun, creative, and relaxing. You can customize every shape, color, and pattern exactly how you like it.
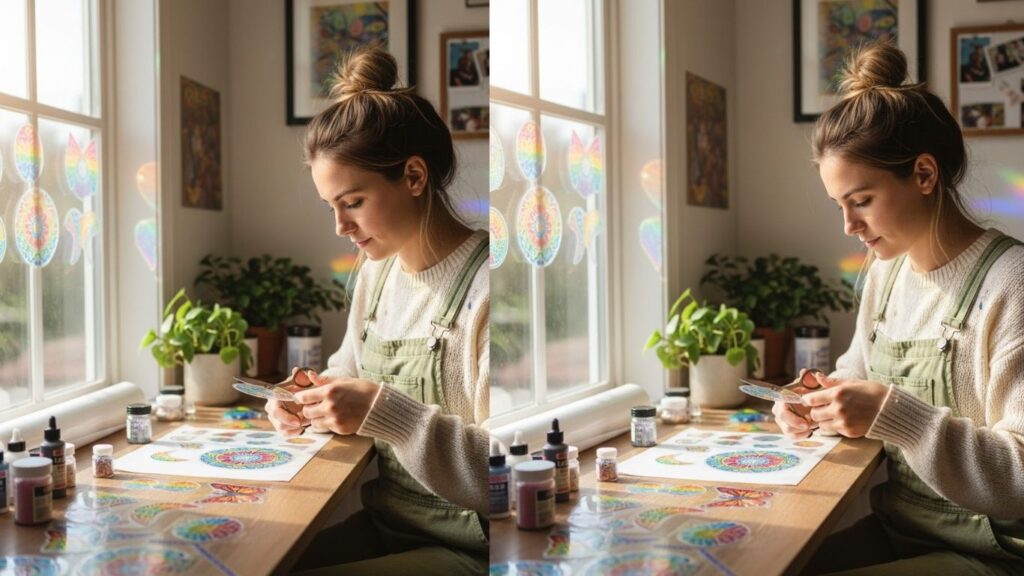
This guide will help you explore various ways to make stunning suncatcher stickers from simple and inexpensive materials to more advanced techniques.
Before we begin, gather a few essential items that will make the process easier:
- Transparent sticker sheets
- Translucent or glass paints
- Fine-tip markers (for details)
- Adhesive laminating sheets
- Silicone mold for shapes
These items will help you create bright, colorful, and durable suncatcher stickers that catch light beautifully.
Understanding Suncatcher Stickers
Suncatcher stickers are translucent decorative pieces that allow light to pass through them. Unlike opaque stickers or printed designs, suncatcher stickers shine when sunlight hits them, creating rainbow-like reflections or stained‑glass effects. They often incorporate bright colors, contrast outlines, and patterns that play with light and shadow.
Making them combines creativity with simple artistic techniques. You’ll learn how color transparency works, how to apply paints or inks to clear vinyl, and how to cut and finish your designs so they look professional and shine in sunlight.
1. Hand‑Painted Suncatcher Stickers
Creating suncatcher stickers by hand allows for complete freedom of design and color blending.
Step 1: Prepare Your Transparent Base
Take a transparent sticker sheet or clear acetate sheet. Make sure the surface is clean and free of dust.
Step 2: Sketch Your Design Lightly
Use a fine‑tip marker to sketch the outlines of your design. Simple shapes like flowers, hearts, suns, or butterflies work well.
Step 3: Choose Translucent Paints
Select paints labeled translucent or glass paint. These paints let light pass through while maintaining vibrant color.
Step 4: Apply Paint Inside Outlines
Fill each section with paint. You can layer colors lightly to create gradient effects. Work slowly to keep colors even.
Step 5: Let Paint Dry Completely
Allow the paint to dry fully, which may take 30 minutes to an hour depending on thickness and humidity.
Step 6: Add Fine Line Details
Once dry, you can enhance your design with fine‑tip markers. Add tiny dots, swirl patterns, or border lines to enhance visual depth.
Step 7: Cut and Apply
Carefully cut around the outlines of your design and peel off the backing. Place your sticker on a clean glass surface.
Hand‑painted suncatcher stickers are flexible in design and look particularly beautiful when viewed against direct sunlight, casting colorful reflections into your room.
2. Printable Suncatcher Stickers
If you prefer digital designing, printable suncatcher stickers offer precision and reproducibility.
Step 1: Create Digital Designs
Use a drawing program to design suncatcher stickers. Keep shapes clear and colors soft enough to let sunlight pass through.
Step 2: Arrange Multiple Designs on One Page
This helps save space and lets you print more stickers at once.
Step 3: Print on Transparent Sticker Paper
Use high‑quality transparent sticker sheets to ensure vibrant colors and clean images.
Step 4: Let Printed Colors Dry
If your printer uses ink that stays wet for a few minutes, give it time to settle to avoid smudging.
Step 5: Laminate for Strength
Place a clear adhesive laminate over the printed sheet. This protects colors and strengthens the sticker.
Step 6: Cut Around Each Shape
Use scissors or a precise craft knife to separate designs.
Step 7: Apply to Glass or Plastic
Stick your finished stickers onto windows or smooth surfaces where light can hit them directly.
Printable suncatcher stickers are excellent for beginners who prefer clean edges and consistent colors.
3. Gel‑Based Suncatcher Stickers
Gel pens or gel paints create slightly three‑dimensional translucent effects that shine beautifully.
Step 1: Choose a Clear Sheet
Work with clear acetate or transparent sticker paper.
Step 2: Draw the Outline with Marker
Sketch the shapes you want in your design.
Step 3: Select Gel Paints or Gel Pens
Pick translucent gel paints or gel pens. These often dry glossy and smooth.
Step 4: Fill in the Color Slowly
Work in small sections to avoid smears. Gel colors can be layered lightly for depth.
Step 5: Let Gel Dry Completely
Gel paints take longer to dry. Wait until they are totally set to the touch.
Step 6: Add Texture or Highlights
Use a contrasting gel color to add small dots, highlights, or textured details.
Step 7: Cut and Stick
Trim each design out and place it on a window or glass surface.
Gel‑based designs produce a shiny, smooth effect that glows in the sun.
4. Stained‑Glass Style Suncatcher Stickers
This method gives a stained‑glass look using bold outlines and bright translucent colors.
Step 1: Outline with a Thick Black Marker
Create a network of small sections like real stained glass.
Step 2: Choose Bright Translucent Paints
Use colors that are vibrant but allow light to pass through.
Step 3: Fill Each Section Carefully
Avoid mixing colors unless you want a blended gradient effect.
Step 4: Add Special Effects
You can add small sparkles, dots, or tiny stars inside sections.
Step 5: Let Everything Dry Fully
Drying completely before cutting keeps colors crisp.
Step 6: Cut Around the Edges
Precision cutting helps maintain the stained‑glass aesthetic.
Step 7: Apply to Window Glass
When the sun hits the design, colorful light streams into your space.
Stained‑glass style designs are especially stunning in larger shapes like suns, rainbows, and floral arrangements.
5. Layered Paper Suncatcher Stickers
Layering translucent paper can create a multi‑dimensional colorful effect.
Step 1: Cut Translucent Vellum or Tracing Paper
Choose light‑colored vellum that lets light pass through.
Step 2: Draw the Design on Multiple Layers
You can split complex designs into layers for depth.
Step 3: Color with Light Transparent Markers
Avoid dense coloring as it blocks light. Color lightly and evenly.
Step 4: Combine Layers with Glue Dots
Attach layers gently so they float slightly above each other.
Step 5: Add Fine Details on Top
After layering, enhance with small outlines or dots.
Step 6: Trim Carefully
Cut around the shapes neatly for a clean finish.
Step 7: Attach to Glass
Multi‑layered stickers cast soft pastel shadows.
This layered technique is ideal for designs like butterflies, flowers, and abstract sunburst patterns.
6. Resin Suncatcher Stickers
Resin suncatcher stickers are durable and offer a shiny, almost glass‑like finish.
Step 1: Prepare Your Silicone Mold
Choose molds shaped like stars, hearts, suns, or abstract shapes.
Step 2: Mix Transparent Resin
Follow instructions to mix resin and hardener.
Step 3: Add Translucent Pigments or Glitter
Colored resin gives a stained‑glass feel.
Step 4: Pour into Mold Carefully
Avoid bubbles. Use a toothpick to pop any that rise.
Step 5: Let Resin Cure Fully
This can take many hours. Be patient to get a hard, shiny finish.
Step 6: Demold Carefully
Once cured, gently remove resin shapes from molds.
Step 7: Apply with Adhesive
Use clear glue dots or sticker backing to attach to glass.
Resin stickers are strong and durable, perfect for permanent decoration.
7. Puffy Paint Suncatcher Stickers
Puffy paint gives texture and color that catches light beautifully.
Step 1: Use Transparent Sheets
Acetate or clear sticker sheets work best.
Step 2: Sketch Outlines with Marker
Draw simple shapes first.
Step 3: Apply Puffy Paint in Bright Colors
Puffy paint dries translucent and slightly raised.
Step 4: Let Dry Thoroughly
Puffy paint takes time to dry completely.
Step 5: Add Fine Details
When dry, use markers or gel pens for highlights and textures.
Step 6: Cut Out Shapes
Trim neatly for a professional finish.
Step 7: Apply to Windows or Mirrors
These textured stickers catch sunlight and reflect soft colors.
Puffy paint designs are fun for kids and adults alike, and they give a playful 3D effect.
Creative Suncatcher Sticker Ideas
- Rainbow sunbursts with soft gradients
- Butterfly pairs in pastel colors
- Blooming flowers in layers of pinks and yellows
- Magical stars and moons with sparkles
- Cartoon animals with bright translucent patches
- Seasonal themes like autumn leaves or snowflake bursts
- Geometric patterns with repeating translucent shapes
These ideas are just starting points — you can combine shapes, colors, and personal touches to make original designs.
Tips for Perfect Suncatcher Stickers
Choose Light‑Friendly Colors
Pick bright colors that are not too dense.
Work in Thin Layers
Thin paint layers let light pass through better.
Let Dry Before Cutting
Cutting before drying can distort the design.
Use Quality Transparent Sheets
Cheaper sheets can warp or scratch easily.
Test Designs in Sunlight
Check how colors look when sunlight hits them.
Use Small Details for Interest
Dots, sparkles, or highlights enhance visual appeal.
Store Flat When Not in Use
Keeping stickers flat prevents curling and damage.
Good technique and patience go a long way in making beautiful suncatcher stickers.
Common Mistakes to Avoid
Using Too Dark Paints
Opaque colors block light.
Rushing Drying Time
Wet colors can smudge or smear.
Cutting Unevenly
Jagged edges take away from shine effects.
Ignoring Surface Cleanliness
Dust or fingerprints affect adhesion.
Skipping Protection Layer
Laminating improves durability and color longevity.
Avoiding these mistakes ensures your finished suncatcher stickers look polished and shine brilliantly.
Frequently Asked Questions
What materials do I need to make suncatcher stickers?
You need transparent sheets, translucent paints, markers, laminating sheets, and cutting tools.
Can children make suncatcher stickers safely?
Yes, with supervision for paints and scissors.
How long do suncatcher stickers last?
With proper care, they can last many months or years.
Can I sell my handmade suncatcher stickers?
Yes, original designs can be sold online or at craft fairs.
Do I need special paints for suncatcher stickers?
Translucent paints or glass paints work best for light transmission.
How do I apply suncatcher stickers so they stick well?
Clean the surface first and press firmly when applying.
Can I reuse suncatcher stickers?
Depending on materials, some can be moved and reapplied if backing stays intact.
Final Words
Making suncatcher stickers is an uplifting craft that combines light, color, and creativity. With simple tools and imagination, you can make stunning pieces that brighten your space and bring joy whenever sunlight streams through them.
Whether you choose paints, digital designs, resin, or paper techniques, each method offers unique effects and endless creative possibilities. Let light inspire you and enjoy every moment of crafting your own radiant suncatcher stickers.