
Water bottle stickers are a fun way to personalize bottles, promote events, create gifts, or decorate spaces. Making your own water bottle stickers lets you choose unique designs, colors, and themes to match your style or purpose. With a few supplies, you can create durable and attractive stickers at home.
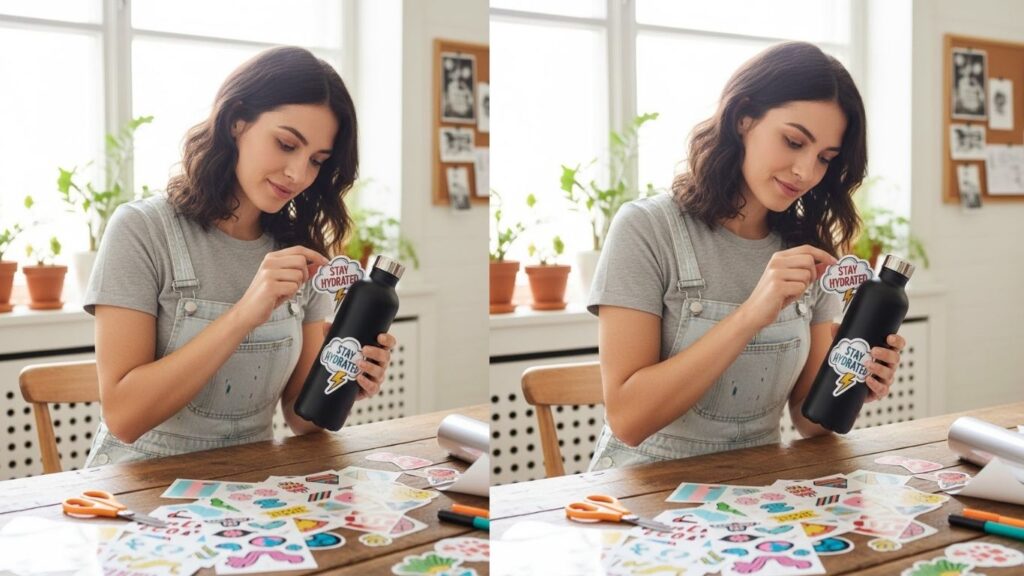
Here are five items you might want to use for making water bottle stickers: sticker paper, waterproof vinyl sheets, cutting tools, protective laminate sheets, and design markers. These tools will help you make long‑lasting, high‑quality water bottle stickers.
Water Bottle Stickers
Water bottle stickers are decorative labels designed to adhere to plastic, metal, glass, or reusable bottles. The right materials and techniques make the stickers durable, water‑resistant, and visually appealing. Before starting with methods, it helps to organize your workspace, select your design style, and choose whether you want printed, hand‑made, or layered effects for your stickers.
Printable Vinyl Water Bottle Stickers
- Prepare your design on a computer program using illustrations, text, or printed templates.
- Choose waterproof vinyl sticker sheets to prevent fading and ensure durability.
- Check your printer settings for best quality printing on vinyl sheets.
- Print the design onto the vinyl sheet, allowing ink to dry fully before cutting.
- Cut each sticker carefully with scissors or a craft cutting machine.
- Peel off the backing and apply the water bottle sticker smoothly on a clean bottle surface.
- If desired, use a protective laminate sheet over the sticker for extra durability and water resistance.
Printable vinyl stickers offer clean, professional designs that resist water and scratches, making them ideal for water bottles used daily.
Hand‑Drawn Water Bottle Stickers
- Start with waterproof or vinyl sticker paper that works with markers or paints.
- Lightly sketch your design with a pencil, such as flowers, names, quotes, or patterns.
- Trace and color the sketch using permanent markers, acrylic paints, or paint pens.
- Allow colors to dry completely before cutting.
- Cut out your hand‑drawn designs with precision scissors.
- Apply sticker to a clean, dry water bottle surface.
- Seal with a clear protective sheet or coating to enhance water resistance and longevity.
Hand‑drawn stickers give a unique and personal artistic touch, making each water bottle special.
Washi Tape Water Bottle Stickers
- Choose washi tapes in colors and patterns that complement your design theme.
- Stick washi tape onto waterproof vinyl sheets or directly onto a clean bottle surface.
- Use scissors or a craft knife to cut shapes, strips, or layered patterns.
- Create floral shapes, stripes, or geometric effects by overlapping tapes.
- Trim edges for a clean finish.
- Press down stickers firmly to avoid air bubbles.
- Seal with a protective laminate sheet or clear coating for added durability.
Washi tape stickers offer vibrant colors and layered patterns that are easy to create without printing.
Transparent Water Bottle Stickers
- Purchase transparent or clear waterproof sticker sheets suitable for ink or marker use.
- Draw or print your designs directly on the transparent sheet surface.
- Cut out the shapes carefully using scissors or a precision knife.
- Peel off the backing and stick the transparent design to your water bottle.
- Smooth out air bubbles with a flat tool or card.
- Layer them over other designs or colors for creative effects.
- Add a protective transparent laminate if extra waterproofing is needed.
Transparent water bottle stickers have an elegant finish that blends perfectly with the bottle material.
Puffy 3D Water Bottle Stickers
- Use craft foam sheets, puff paint, or layered vinyl to create raised sticker designs.
- Draw individual petals, shapes, or layers on foam or vinyl pieces.
- Cut each piece carefully with scissors or craft tools.
- Layer pieces to create dimensional elements like flowers, names, or symbols.
- Use adhesive or double‑sided foam tape between layers for depth.
- Press the finished 3D design onto the water bottle surface.
- Apply a clear, flexible coating if needed to protect raised portions.
3D stickers provide a tactile and eye‑catching design, perfect for kids’ bottles or creative projects.
Collage Style Water Bottle Stickers
- Collect small pieces of patterned paper, printed designs, texture sheets, or old labels.
- Arrange collage pieces on waterproof vinyl or heavy sticker paper.
- Layer shapes to form flowers, monograms, scenes, or abstract art.
- Glue pieces onto the sticker sheet with waterproof adhesive.
- Trim excess edges for well‑defined shapes.
- Cut individual collage stickers.
- Stick them to clean bottles and press firmly to secure.
Collage style stickers are richly textured and customizable, perfect for eclectic and artistic water bottle designs.
Laminated Custom Water Bottle Stickers
- Create your desired design either by hand or with a computer.
- Print or draw designs on waterproof sticker paper or vinyl.
- Apply a clear protective laminate over the surface before cutting.
- Trim the laminated design into sticker shapes.
- Stick the laminated sticker onto a clean bottle surface.
- Press firmly and smooth wrinkles or bubbles.
- Use additional lamination for high‑traffic or outdoor bottles.
Laminated stickers are extremely durable and washable, perfect for outdoor use or gym bottles.
Designing Tips for Great Water Bottle Stickers
Creating great water bottle stickers goes beyond making shapes. Here are tips to enhance your designs:
Color and Contrast
Choose vibrant colors that contrast with your water bottle color so that designs stand out clearly. Lots of bright tones, pastels, or bold text can make your stickers pop.
Lettering and Fonts
If adding names or quotes, choose easy‑to‑read font styles. Hand lettering or digital fonts can reflect the mood of your design — cursive for elegant designs, bold block letters for modern stickers.
Size Planning
Measure your water bottle’s surface area before creating designs. Larger bottles allow bigger, more detailed stickers, while smaller bottles require compact shapes.
Multiple Themes
Create themed sticker packs — floral, motivational quotes, monograms, geometric patterns, or holiday designs — to mix and match on bottles.
Testing Materials
Try your materials on scrap surfaces to test waterproofing, ink quality, and color effects before final application.
FAQ
Can water bottle stickers be waterproof?
Yes, using waterproof vinyl or laminating your stickers makes them resistant to water, condensation, and regular washing.
How long do custom water bottle stickers last?
With quality material and proper sealing, water bottle stickers can last months or even years under normal use.
Can I wash a bottle with stickers on it?
Yes, but hand washing is recommended over dishwashers to protect the edges and adhesive.
What surface works best for water bottle stickers?
Smooth, non‑porous surfaces like stainless steel, glass, or coated bottles provide the best adherence.
Can I remove water bottle stickers without residue?
Yes, gently heating the sticker with warm water or hair dryer makes removal easier and reduces residue.
Final Words
Making water bottle stickers at home is a fun and creative way to personalize bottles for daily use, gifts, events, or branding projects. With multiple techniques available, from printable vinyl designs to layered and puffy effects, you can create unique and durable water bottle stickers tailored to any style. Enjoy the process of designing, cutting, and applying your custom creations, and make bottles that reflect your personality and creativity!